
The Complete Guide to Welding Equipment
A complete guide to welding equipment: machine types, consumables like electrodes and shielding gas, essential accessories, costs, safety, and buying advice.

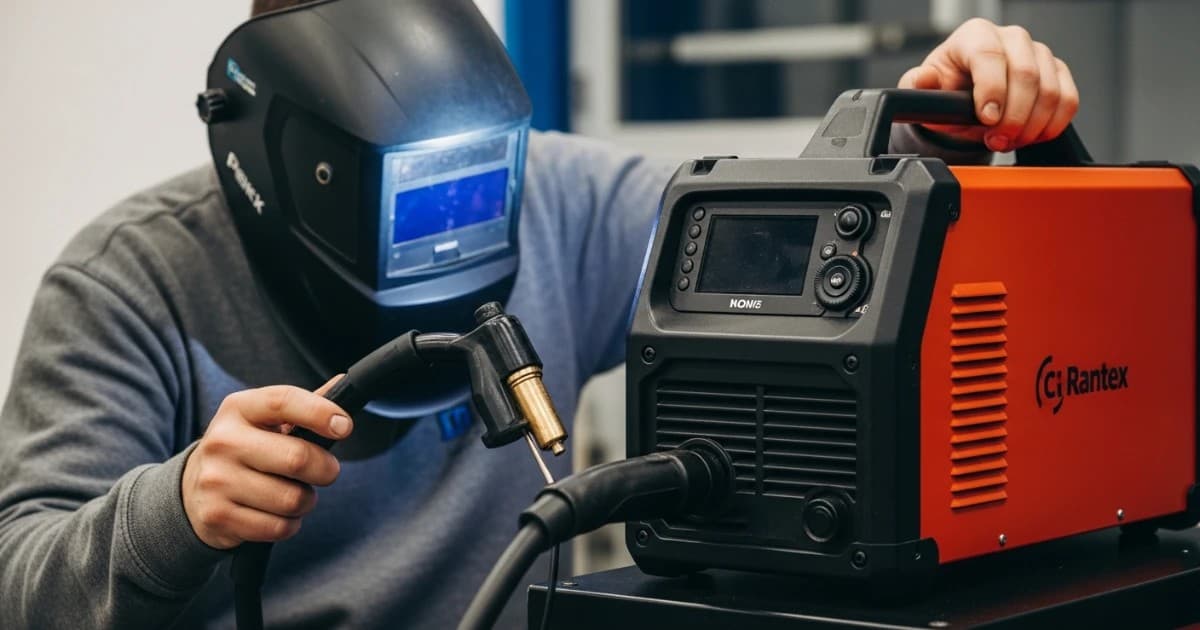
Buy the wrong welding machine and you'll fight it for years. Buy the right one but pair it with the wrong wire, gas, or tip, and it will never run the way it's supposed to. Welding equipment isn't one purchase, it's three interlocking categories, the machine that generates the arc, the consumables that get burned up with every pass, and the accessories that keep the operator safe and the work held in place, and getting any one of them wrong undermines the other two.
This guide walks through all three categories in the order they actually matter when you're setting up a bay, a garage, or a fabrication shop: what each machine type does well, which consumables belong with which process, what accessories are non-negotiable, and how to avoid the equipment mistakes that quietly cost welders money and quality for years. Whether you're outfitting a first home setup or auditing a shop that's grown haphazardly, the goal is the same, buy once, buy correctly, and understand why each piece is there.
The Three Categories of Welding Equipment
It helps to be precise about the vocabulary, because vendors and catalogs use it loosely.
Machines (also called power sources) are the capital equipment: MIG, TIG, stick, and multiprocess welders, plasma cutters, and engine-driven units. You buy a machine once and expect it to last a decade or more.
Consumables are anything the process burns up and you must keep replenishing: electrodes, filler wire, tungsten, shielding gas, flux, contact tips, nozzles, and liners. Consumables are a recurring line-item cost, and choosing the wrong one for a given base metal or process is one of the fastest ways to produce a weak, porous, or cracked weld.
Accessories are everything else that supports the work: helmets and PPE, clamps and welding tables, gas regulators and hoses, grinders, wire brushes, and fume extraction. None of them touch the arc directly, but skip enough of them and the machine and consumables can't do their job safely or well.
A common setup mistake is treating this as a single shopping trip focused entirely on the machine. A capable welder with a mediocre power source will often outweld a beginner with a top-tier machine, because so much of weld quality comes down to matching consumables to the joint and having the accessories to prep, hold, and finish the work correctly.
Welding Machines: Power Sources and Process Types
The welding machine is the one purchase decision that locks in everything downstream, since your process choice determines which consumables you'll be buying for years.
The core arc welding processes
MIG welding (GMAW) feeds a continuous solid wire electrode through a gun while an external shielding gas protects the weld pool from atmospheric contamination. It's the easiest process to learn, produces minimal spatter, and is the default recommendation for beginners and general fabrication because the wire feed does most of the work that a stick welder's hand and timing otherwise control.
TIG welding (GTAW) uses a non-consumable tungsten electrode to establish the arc while the welder manually feeds a separate filler rod, often while controlling heat with a foot pedal. It produces the cleanest, most precise, and most cosmetically refined welds of any common process, but it is the slowest to learn and the slowest to run, which makes it the natural choice for thin material, stainless steel, aluminum, and any job where appearance and precision matter more than speed.
Stick welding (SMAW) uses a flux-coated consumable electrode; as it melts, the flux forms a gas and slag layer that shields the weld from contamination. It tolerates wind, rust, mill scale, and dirty or damp material better than any other common process, which is why it remains the standard for outdoor construction, pipeline, and field repair, even though it leaves slag that has to be chipped off.
Flux-cored welding (FCAW) looks like MIG on the outside; a wire feeder pushes a tubular wire, but the wire's core contains flux that generates its own shielding as it burns. Self-shielded flux-cored wire needs no external gas at all, making it far more wind-tolerant than MIG for outdoor and structural work, at the cost of more spatter, smoke, and slag to clean.
Plasma arc cutting and welding forces a shielding gas through a constricted nozzle where an arc converts it into an ionized plasma jet hot enough to cut or weld thick material with a narrow, high-energy column. It's a specialized tool rather than a general-purpose one, showing up most often in fabrication shops that need clean, fast cuts on plate steel.
Choosing between them
| Process | Skill floor | Shielding | Best for | Weak point |
|---|---|---|---|---|
| MIG (GMAW) | Low | External gas | Beginners, general fabrication, thin-to-medium steel | Struggles outdoors/windy conditions |
| TIG (GTAW) | High | External gas | Precision, thin metal, aluminum, stainless, cosmetic welds | Slow, steep learning curve |
| Stick (SMAW) | Medium | Flux coating | Outdoor, dirty/rusty metal, field repair, thick sections | Slag cleanup, more spatter |
| Flux-cored (FCAW) | Low-Medium | Flux core (gas optional) | Outdoor structural work, high deposition rate | More smoke, spatter, slag |
No single process is objectively "best." A home garage building light steel projects indoors is usually best served by MIG; a farm doing outdoor equipment repair on rusty steel gets more mileage from stick or self-shielded flux-cored; a fabricator doing stainless food-service equipment needs TIG. Many working shops end up owning a multiprocess inverter machine that switches between MIG, stick, and TIG, precisely so the process decision can be made per job rather than locked in at purchase time.
Inverter versus transformer power sources
Older welding machines used heavy step-down transformers to convert incoming power to welding current. Modern machines increasingly use inverter technology, which converts power at high frequency through solid-state electronics before stepping it down. Inverters are dramatically lighter and more compact for the same output, run at higher electrical efficiency, and generally produce a more stable, controllable arc, which is part of why multiprocess and portable machines are almost universally inverter-based today. Transformer machines remain simpler, more tolerant of harsh environments, and cheaper to repair with basic tools, which still earns them a place in some industrial and field applications. For a new purchase, an inverter is the practical default; a transformer machine only makes sense when ruggedness and low-tech serviceability outweigh weight and precision.
Reading the spec sheet: amperage, voltage, and duty cycle
Three numbers on a spec sheet tell you almost everything about whether a machine fits your work.
Amperage is the current that drives heat into the joint and controls penetration. As a rough rule of thumb, expect to need about 1 amp for every 0.001 inch (0.025 mm) of steel thickness, so a 1/8-inch (3 mm) plate needs roughly 120 amps. Too little amperage leaves cold, weak welds that sit on the surface; too much burns through thin material.
Voltage shapes the arc itself rather than the heat. Higher voltage stretches the arc longer and produces a wider, flatter bead; lower voltage tightens the arc into a narrower, more built-up bead. Voltage set outside the sweet spot for the wire speed and material shows up as spatter, an unstable arc, or an inconsistent bead.
Duty cycle describes how long a machine can run at a given amperage within a 10-minute window before it must cool down. A 200-amp machine rated at 30% duty cycle can run continuously at 200 amps for 3 minutes, then needs 7 minutes to cool before resuming. Duty cycle is where hobbyist, light-industrial, and heavy-industrial machines separate from each other; a bargain machine's headline amperage number means little if its duty cycle at that amperage is so low it trips on any real production run. When comparing machines, check whether the duty cycle rating follows a recognized testing standard such as EN 60974-1, since manufacturers that skip this can advertise optimistic numbers under ideal, non-representative conditions.
Matching machine size to the work
For light-duty DIY and hobby work, a 110–120V machine in the 90–140A range comfortably handles sheet metal and thin-to-medium material (roughly 1.5–6 mm). Stepping up to a 220–240V machine in the 180–250A range opens up thicker structural steel and heavier fabrication, and is the realistic minimum for anyone doing regular work above light-gauge material. Three-phase machines belong in industrial settings with the electrical service to support them and rarely make sense for a home shop. Buying more machine than the work requires isn't wrong, headroom is rarely wasted, but buying less than the work requires guarantees frustration and a second purchase down the line.
Welding Consumables: What Gets Used Up and Why It Matters
Consumables are where weld quality is won or lost on a joint-by-joint basis, because the wrong choice here can undermine an otherwise correctly set-up machine.
Stick electrodes
Stick electrodes are classified under American Welding Society specifications, most commonly AWS A5.1 for carbon steel and A5.9 for stainless. The classification code on the box is not decorative; it encodes real performance information. Take E7018 as an example: the "E" marks it as an electrode, "70" indicates 70,000 psi minimum tensile strength, the "1" signals an all-position electrode, and the "8" describes a low-hydrogen iron-powder coating suited to AC or DC current. Low-hydrogen electrodes like the 7018 series resist hydrogen-induced cracking and are the standard choice for structural and pressure-vessel work; general-purpose electrodes like 6011 or 6013 strike more easily and tolerate dirtier metal, but aren't the right call where crack resistance matters most.
Filler wire and rod
MIG wire, TIG filler rod, and flux-cored wire all have to be matched to the base metal, not just the process. Mild steel calls for a solid ER70S-family wire; stainless steel needs a wire matched to the specific stainless alloy to preserve corrosion resistance; aluminum requires aluminum-specific wire, typically a 4043 or 5356 alloy depending on the application, run through equipment set up for the much softer aluminum wire feed. Using a mismatched filler metal doesn't just look wrong, it can leave a joint with the wrong mechanical properties or poor corrosion resistance for the service the part will see.
Tungsten electrodes for TIG
TIG tungsten electrodes are color-coded by their alloying additive, and the color is a selection shortcut worth memorizing rather than guessing at:
- Green (pure tungsten) — favored for AC welding of aluminum and magnesium.
- Red (2% thoriated) — a long-standing default for DC welding of steel, stainless, and nickel alloys, though its mild radioactivity has pushed many shops toward alternatives.
- Blue (2% lanthanated) — a genuinely all-purpose electrode that handles both AC and DC work with stable arc starts across a wide amperage range.
- Gold (1.5% lanthanated) — a common, safer substitute for thoriated tungsten with easy starts on steel, stainless, and aluminum.
- Grey (2% ceriated) — best suited to low-amperage, thin-gauge, and precision work.
Selecting the right tungsten comes down to matching three things at once: AC or DC current, the base metal, and the amperage range, in that order.
Shielding gas
Shielding gas choice changes bead appearance, penetration, and spatter as much as any machine setting. Mild steel MIG welding commonly runs a 75%/25% argon/CO₂ blend (often called C-25), which balances penetration with a manageable spatter level; stainless steel typically uses a tri-mix or a 90%/10% argon/CO₂ blend, or in some cases straight argon, to protect corrosion resistance; TIG welding almost universally runs pure argon, or an argon-helium blend when extra heat is needed on thicker aluminum. Running the wrong gas mix for the metal is a quiet, common cause of porosity and poor bead profile that gets blamed on the machine or the welder's technique when the real issue is sitting on the cylinder.
The consumables people forget
MIG guns and TIG torches have their own wear parts, contact tips, nozzles, and liners on the MIG side, collets, collet bodies, and cups on the TIG side, and all of them degrade with use. A worn contact tip enlarges past the wire diameter and causes erratic arc behavior and poor current transfer long before it looks visibly damaged. These small parts are inexpensive and easy to overlook, but a shop that doesn't stock spares will eventually lose production time waiting on a part that costs a few dollars.
Welding Accessories: Everything That Isn't the Arc
Accessories don't touch the weld pool, but a shop without them can't safely or effectively use the machine and consumables it has.
Personal protective equipment
At minimum, welding PPE means a helmet with the correct filter shade for the process and amperage, safety glasses worn underneath it, flame-resistant clothing in leather, FR cotton, or aramid fiber, welding gloves matched to the process (thick and insulated for stick and MIG, thinner and more dexterous for TIG), and sturdy leather boots. Auto-darkening helmets have become the practical standard because they switch from a light to a dark state in a fraction of a millisecond when the arc strikes, removing the temptation to tack-weld with the hood flipped up, a habit responsible for a large share of flash-burn injuries. Respiratory protection deserves particular attention: mild steel fume is a lower-acuity hazard than fume from stainless steel or coated metals, which can contain hexavalent chromium, nickel, or zinc, and the right respirator, from a welding-rated disposable mask up to a powered air-purifying respirator, should be matched to that specific hazard rather than chosen by habit.
Work-holding and setup
A dedicated steel welding table, a solid set of C-clamps and locking pliers, magnetic angle holders, and a sturdy bench vise turn inconsistent fit-up into a repeatable process. Fixturing isn't glamorous, but a joint held square and tight before the arc ever strikes prevents more weld defects than any machine setting can fix afterward.
Gas delivery equipment
For processes that use bottled gas, a properly rated regulator, matched hoses, and, on oxy-fuel equipment, a flashback arrestor on both the fuel and oxygen lines are not optional extras. A flashback arrestor stops a flame front from propagating back up the hose into the regulator or cylinder, typically combining a flame barrier, a non-return check valve, and a thermal cutoff; many jurisdictions require them by regulation, and skipping them on oxy-fuel setups is one of the few equipment shortcuts with genuinely catastrophic downside.
Prep and finishing tools
Angle grinders with cutting and flap discs, wire brushes, chipping hammers, and metal files handle the work that happens before and after the arc: cleaning mill scale, rust, paint, and oil off the joint, and cleaning up spatter and slag afterward. Surface prep is one of the most consistently skipped steps across every skill level, and welding over dirty, oily, or rusted metal is a fast route to porous, weak welds that fail under load regardless of how well the machine was set.
Fume extraction and ventilation
Local exhaust ventilation, a movable extraction arm, a downdraft table, or a fixed hood, is the preferred way to remove welding fume before it reaches the breathing zone, and it should be treated as core equipment rather than an accessory bolted on later. Respirators are the backup layer for when ventilation alone can't bring exposure low enough, not a substitute for it.
How to Choose Equipment for Your Situation
Work backward from the job, not forward from a catalog.
Material and thickness narrow the process fast: thin sheet and precision work point toward TIG or MIG, thick structural steel points toward stick or flux-cored, and aluminum or stainless steel push toward TIG or a MIG setup with matched wire and gas.
Environment matters as much as material. Indoor, controlled conditions favor MIG's clean gas-shielded arc; outdoor, windy, or dirty conditions favor stick or self-shielded flux-cored, since wind disperses external shielding gas before it can protect the weld pool.
Available power is a hard constraint, not a preference. A 110–120V home outlet limits you to lighter machines and thinner material; stepping up to 220–240V unlocks serious structural capacity but requires the right circuit, and three-phase is an industrial-only consideration.
Frequency and volume of use decide how much duty cycle and build quality you actually need. Occasional hobby welding rarely justifies a heavy-industrial machine; a production shop running an arc for hours a day will burn through a hobbyist-grade machine's duty cycle and reliability within months.
Budget should account for the whole system, not just the machine. A welder who spends everything on the power source and skimps on PPE, gas equipment, and work-holding hasn't actually reduced total cost, they've just deferred it and added risk in the meantime.
What Equipment Costs in Practice
Entry-level MIG or stick machines with basic safety gear are commonly available from around $200 to $600, and true budget multiprocess units capable of flux-core, gas MIG, stick, and light TIG can be found under $300. Mid-range MIG machines with better duty cycles and features run roughly $350 to $700. Dedicated AC/DC TIG machines suited to aluminum and stainless work, along with heavier-duty professional MIG and multiprocess machines, typically start around $700 and can run well past $1,500 to $3,000 for industrial-grade units. Consumables are the recurring cost that's easy to underbudget: gas refills, wire, electrodes, contact tips, and grinding discs add up over a year to a sum that can rival the machine's purchase price for anyone welding regularly, which is worth factoring in before comparing sticker prices between processes.
Common Equipment Mistakes
A handful of mistakes account for most of the frustration and wasted material reported by welders at every skill level.
Skipping surface prep is the single most common error across experience levels; welding over dirt, oil, rust, or mill scale produces welds that look acceptable and fail under stress. Guessing at machine settings instead of running a test bead on scrap wastes rod and wire and produces inconsistent results that get blamed on the equipment. Ignoring routine maintenance, worn liners, loose cable connections, a dirty ground clamp, lets small problems degrade weld quality gradually until the cause is hard to trace. Mismatching consumables to the base metal, running mild-steel gas on stainless, or the wrong filler alloy on aluminum, produces porosity and weak joints that no amount of technique can fully compensate for. Underinvesting in PPE and ventilation to save money on the visible machine purchase shifts cost onto long-term health rather than eliminating it. And buying a machine sized for today's project instead of the realistic range of work ahead is one of the most common reasons welders end up purchasing a second machine within a year or two.
Maintaining Welding Equipment
Equipment that's inspected regularly lasts longer and welds more consistently than equipment that's run until something fails. A practical rhythm looks like this: before each use, check cables, the ground clamp, and gas hoses for visible damage, and confirm the helmet lens darkens properly. Monthly, inspect cable connections, the electrode holder or MIG gun, feeder cables, the gas regulator, and look over PPE for wear. Annually or biannually, schedule a deeper inspection or professional service to check calibration and internal components, particularly on machines used daily. Always disconnect power and follow lockout procedures before opening a machine or servicing cables, and keep a fire extinguisher within reach any time hot work is underway. None of this is complicated, but it's the difference between equipment that fails predictably during a scheduled check and equipment that fails mid-job.
Common Misconceptions
"A more expensive machine automatically produces better welds." Skill, joint prep, and correctly matched consumables affect weld quality far more than machine price once a machine is capable of the process at hand. A mid-range machine run well outperforms a premium machine run carelessly.
"Any electrode or wire works with any process or metal." Consumables are process- and metal-specific. An electrode rated for mild steel doesn't belong on stainless, and gas blends that work for MIG steel can actively hurt a stainless or aluminum weld.
"Duty cycle numbers are directly comparable across brands." Duty cycle depends on testing conditions and ambient temperature as much as the rating itself; a machine tested to a recognized standard like EN 60974-1 gives a more trustworthy number than one that isn't.
"PPE is only needed by the person holding the torch." Ultraviolet radiation from an open arc can affect anyone nearby with an unobstructed view of it, not just the welder, which is why shielding screens and bystander protection matter in shared spaces.
Conclusion
Good welding results come from three things working together, not one impressive purchase. Pick the machine that matches your material, environment, and power supply; pair it with consumables chosen for the base metal and joint rather than whatever's cheapest on the shelf; and back both of those with the PPE, work-holding, and gas-handling accessories that let you use them safely and repeatably. Skimp on any one leg of that stool and the other two can't fully make up the difference.
If you're just getting started, resist the urge to buy the biggest machine on offer. Buy the process that matches the work you'll actually do, budget for consumables and PPE as seriously as you budget for the machine, and build the habit of maintaining what you own. That combination, more than any single spec on a box, is what separates equipment that serves a welder for a decade from equipment that gets replaced within a year.
Frequently asked questions
What's the difference between welding equipment, consumables, and accessories?
Equipment usually refers to the machine or power source itself, MIG, TIG, stick, or plasma units, which represents a one-time capital purchase. Consumables are the materials the process burns up and must be restocked, such as electrodes, filler wire, tungsten, and shielding gas. Accessories cover everything that supports the work without touching the arc directly, including PPE, clamps, welding tables, gas regulators, and fume extraction.
Which welding machine is best for a beginner?
A MIG welder is generally the easiest entry point because the continuous wire feed and gas shielding produce clean, forgiving results with a shorter learning curve than stick or TIG. A dual-process or multiprocess machine that also runs flux-cored or stick gives more flexibility for outdoor or thicker work as skills grow.
What amperage welder do I need for a given material thickness?
A common rule of thumb is about 1 amp per 0.001 inch (0.025 mm) of steel thickness, so 1/8-inch (3 mm) steel needs roughly 120 amps. Thin sheet metal in the 1.5–3 mm range typically needs 30–90A, while medium-thickness material around 3–6 mm usually calls for 90–140A, and thicker structural steel needs a 220–240V machine capable of 180A or more.
What's the difference between a MIG and a flux-cored welder?
MIG welding uses a solid wire electrode with an external shielding gas, producing clean welds with minimal spatter but struggling in windy or outdoor conditions. Flux-cored welding uses a tubular wire with flux inside it that generates its own shielding as it burns, so self-shielded flux-cored wire needs no external gas and holds up far better outdoors, at the cost of more spatter, smoke, and slag cleanup.
What shielding gas should I use for MIG welding?
For mild steel, a 75%/25% argon/CO₂ blend is the common choice, balancing good penetration with manageable spatter. Stainless steel typically uses a tri-mix or a 90%/10% argon/CO₂ blend to protect corrosion resistance, and aluminum MIG welding runs on pure argon. Matching gas to the base metal matters as much as matching filler wire.
How do I choose the right tungsten electrode for TIG welding?
Match three things: the current type, AC for aluminum and magnesium, DC for steel, stainless, and most other alloys; the base metal; and the amperage range you're running. Color coding makes this easier, green (pure) for AC aluminum work, red (2% thoriated) or gold (1.5% lanthanated) for DC steel and stainless, blue (2% lanthanated) as a genuine all-purpose option, and grey (2% ceriated) for low-amperage precision work.
What does duty cycle mean and why does it matter?
Duty cycle is the percentage of a 10-minute period a machine can run continuously at a given amperage before it needs to cool down. A machine rated 30% at 200A can run 3 minutes at that output before requiring roughly 7 minutes to cool. It matters because it reveals whether a machine is built for occasional hobby use or sustained production work, regardless of its headline amperage rating.
Is an inverter welder better than a transformer welder?
For most buyers, yes. Inverter machines are lighter, more power-efficient, and typically produce a more stable, controllable arc, and nearly all modern multiprocess and portable machines use inverter technology. Transformer machines remain simpler to repair in the field and more tolerant of harsh conditions, which still gives them a role in some industrial settings, but an inverter is the practical default for a new purchase.
How much does it cost to get set up with welding equipment?
A basic entry-level MIG or stick machine with fundamental safety gear typically runs from around $200 to $600, while mid-range machines with better duty cycles fall between roughly $350 and $700. Dedicated TIG machines and heavier-duty professional units generally start near $700 and can exceed $1,500 to $3,000. Ongoing consumable costs, gas, wire, electrodes, and consumable parts, should be budgeted separately since they recur for as long as the machine is in use.
Can I use the same consumables across different welding processes?
No. Stick electrodes, MIG wire, flux-cored wire, and TIG filler rod are not interchangeable between processes, and even within a single process, consumables must be matched to the specific base metal, mild steel wire on stainless steel or aluminum on steel-rated tungsten produces weak, porous, or poor-quality welds regardless of technique.
Do I need 220V power for a welding machine at home?
Not necessarily. A 110–120V machine handles light-duty work on thin-to-medium steel and is sufficient for many home and hobby projects. Stepping up to 220–240V is worthwhile once you're regularly welding thicker structural steel or need higher duty cycle at higher amperage, but it requires a compatible circuit, which is worth confirming before buying a machine that needs it.
References
- 1910.252 - Welding, Cutting, and Brazing, General Requirements - U.S. Occupational Safety and Health Administration. Federal requirements for fire prevention, ventilation, and PPE during welding operations.
- 1926.353 - Ventilation and Protection in Welding, Cutting, and Heating - U.S. Occupational Safety and Health Administration, accessed 2026-07-25.
- Controlling Hazardous Fume and Gases During Welding - U.S. Occupational Safety and Health Administration. Fact sheet on fume hazards and ventilation controls.
- Welding - Ventilation - Canadian Centre for Occupational Health and Safety, accessed 2026-07-25.
- Specification for Carbon Steel Electrodes for Shielded Metal Arc Welding (A5.1/A5.1M) - American Welding Society, 2012. Defines the classification system behind stick electrode designations such as E7018.
- Welding Fumes and Manganese - National Institute for Occupational Safety and Health (NIOSH), accessed 2026-07-25.
- The Effects of Occupational Exposure to Manganese Fume on Neurobehavioral and Neurocognitive Functions - International Journal of Preventive Medicine (PMC), 2020. Cross-sectional study on neurological effects of manganese fume exposure among welders.
- Flashback and Flashback Arrestors in Welding Applications - European Industrial Gases Association, accessed 2026-07-25. Technical guidance on flashback arrestor function and placement in oxy-fuel systems.