
Best Welding Helmets: Auto-Darkening Buying Guide
How to choose the best auto darkening welding helmet: shade range, optical clarity, sensors, viewing area, fit and care, with standards explained plainly.

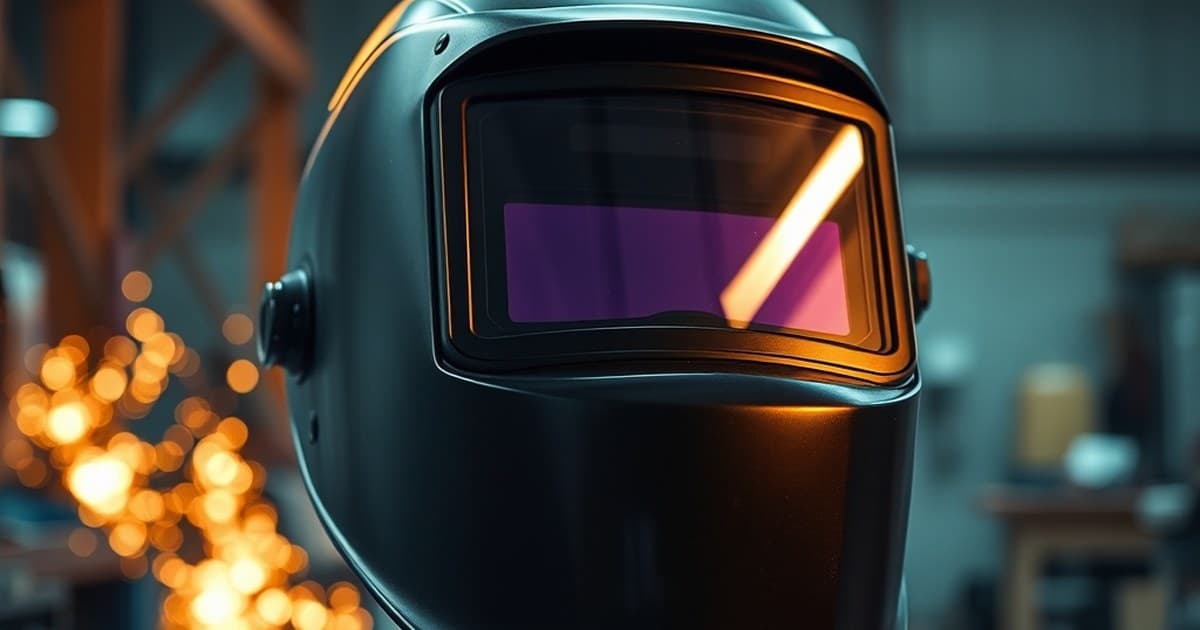
The best auto darkening welding helmet is not a single model. It is the helmet whose filter, sensors, fit and weight match the way you actually weld. A helmet that is perfect for a hobbyist running low-amp TIG on thin stainless can be a poor choice for someone laying down overhead stick welds all day, and the reverse is equally true.
This guide skips the brand rankings and teaches you how to judge a helmet yourself. You will learn what the specifications on the box really mean, which features matter for which process, which ones are mostly marketing, and how to look after the helmet once you own it. Eye protection is a core part of overall welding safety, so we also cover the standards and shade rules that sit behind every purchase.
How an Auto-Darkening Helmet Works
A passive helmet holds a fixed dark filter, commonly around shade 10, so you flip the hood down just as you strike the arc and lift it to inspect your work. An auto-darkening helmet replaces that fixed lens with an auto-darkening filter (ADF): a liquid-crystal cartridge that sits in a light state while you set up and switches to a dark state when the arc ignites.
The standard that describes these filters defines an automatic welding filter as one that switches its scale number from a lower value (the light state) to a higher value (the dark state) when the arc is struck. Four parts do the work:
- Arc sensors detect the brightness of the arc and trigger the switch.
- The liquid-crystal cartridge changes its transmittance electrically.
- A power source, usually solar cells plus a replaceable or built-in battery.
- The helmet shell, which is opaque and impact-resistant and holds everything in place.
The practical benefit is that you can position the electrode or torch with the lens in its light state, keep your head still, and start the arc exactly where you intended. That tends to improve start accuracy, reduces neck strain from repeated nodding, and lets you inspect the joint between passes without lifting the hood.
Auto-darkening versus passive lenses
An ADF is not automatically better in every situation. A passive lens has no electronics to fail, no batteries to replace and a lower price, and some welders prefer its constant optical quality. In very awkward positions, or when the arc is blocked from the sensors, an ADF can behave unpredictably. Many professionals keep both types and pick according to the job.
If you weld occasionally, in varied positions, or you are still learning, an ADF is usually the more forgiving tool. It helps you see the joint before the arc starts, which is exactly where beginners lose accuracy.
Safety Basics Before You Compare Features
Welding arcs emit intense visible light plus ultraviolet and infrared radiation. Eye injury can come from that radiation and also from hot slag and debris that fly off during welding, chipping or grinding. Occupational safety guidance therefore treats the welding helmet as one part of a set of eye and face protection, not as a standalone solution.
Two points deserve emphasis:
- Wear safety glasses with side shields under the helmet. Occupational safety guidance advises wearing goggles or safety glasses with side shields when welding or assisting a welder, even when a helmet is also used. They protect you when you flip the hood up to chip slag or grind.
- Anyone watching the arc needs protection too. Helpers, supervisors and bystanders within sight of the arc need appropriate filters or screens, not just the person holding the electrode.
For a wider look at hazards beyond the eyes, see our overview of welding safety practices, including fume, fire and electrical risks.
Understanding Shade Numbers and Shade Range
A shade number describes how much light a filter lets through: the higher the number, the darker the filter. Filters used for welding span a wide range, and the correct shade depends on the process and the arc current.
Minimum shade is a floor, not a target
U.S. regulations list minimum protective shade numbers by process and current. As an illustration of the pattern:
| Process | Arc current | Minimum protective shade |
|---|---|---|
| Gas tungsten arc (TIG) | Under 50 A | 8 |
| Gas tungsten arc (TIG) | 150–500 A | 10 |
| Gas metal arc / flux-cored | 60–500 A | 10 |
| Shielded metal arc (stick), 5/32 in. class electrodes | 160–250 A | 10 |
| Shielded metal arc (stick), larger electrodes | 250–550 A | 11 |
These numbers are minimums. The same regulatory table notes a practical rule of thumb: start with a shade that is too dark to see the weld zone, then move to a lighter shade that gives a sufficient view without going below the minimum. Industry guidance adds that a shade that is too light can let harmful radiation through, while one that is too dark makes it harder to see the pool and increases mistakes. Treat any chart, including the one above, as a starting point rather than a prescription, and consult your employer's or instructor's requirements.
What range should the helmet cover?
Look for a dark-state range that spans the processes you use, and a light state that is comfortable for your work.
- Fixed-shade ADFs darken to one value, usually in the mid-range. They are simple and cheap, but limiting.
- Variable-shade ADFs let you dial the dark shade, typically from the low 9s to 13. This is the most useful option for anyone who switches between MIG, stick and TIG.
- Wide-range filters can also go down to lower shades for torch work or plasma cutting, though a cutting task may call for different eye protection altogether.
A practical rule: make sure the helmet's top shade comfortably exceeds what you need for your highest-amperage work, and that the lowest dark setting still covers your lowest-amperage welding. A hobbyist doing only MIG on sheet metal and a fabricator running heavy stick can end up with different ranges and both be right.
Optical Clarity and the 1/1/1/1 Rating
Two filters can both be rated shade 11 and still look very different. Optical clarity is about how clean, undistorted and evenly dark the view is. In the European system, automatic welding filters are classified under EN 379, and the resulting rating is written as four numbers, such as 1/1/1/1.
Each of the four numbers grades one optical property, from 1 (best) to 3 (poorest). The properties covered include the optical class of the lens, variations in luminous transmittance, diffusion of light, and angle dependence of transmittance. The standard's contents list these as distinct requirements and tests.
What does it mean for you?
- A 1/1/1/1 filter has the best grades in all four areas and is generally easier on the eyes during long sessions.
- A lower-grade filter may show slight distortion, a hazy look or uneven darkness across the lens, which can cause fatigue.
- The rating alone does not tell you shade range, switching speed or sensor placement; it describes optical quality.
Optical clarity matters most when you weld for hours, work in detailed TIG, or have trouble reading the pool through a dim, tinted lens. For occasional light use, a lower optical grade may be perfectly adequate, so the extra cost is a judgement about your workload, not a safety requirement. Not every helmet publishes the rating, so check the documentation.
Switching Speed, Sensors and Sensitivity
Every ADF has a delay while it switches from light to dark. The standard includes a requirement and test method for switching time, because a slow switch lets arc light reach your eyes before the lens darkens. Reputable filters switch very quickly, but manufacturers report the figure differently, so compare like with like and favor documented, tested values over marketing superlatives.
Number and placement of sensors
Arc sensors can be blocked by your hand, the workpiece or a corner. More sensors, positioned well, reduce the risk of the lens flickering back to light in the middle of a weld.
- Two sensors are common on entry-level helmets and work well in open positions.
- Three or four sensors help in out-of-position work, tight corners or when the arc is partly hidden.
- Sensor sensitivity controls let you tune the response for low-amp work.
Low-amp TIG and bright ambient light
Low-current TIG produces a faint arc that some filters find hard to detect, which can make the lens fail to darken or flicker. If you do delicate work on thin material, look for a filter with adjustable sensitivity and a design intended for low-amp operation. Also remember that direct sunlight or bright shop lights can sometimes trigger a filter, so test the helmet in your real environment.
Test it before you trust it
A simple habit that adds safety: before each session, check that the lens darkens when you strike an arc on scrap, and that it does not stay dark or flicker. If your helmet ever fails to darken, stop and do not continue welding until it is checked.
Viewing Area and Lens Position
The viewing area is the visible window of the filter, usually quoted in square inches or millimetres. A bigger window gives you more peripheral view, which helps when positioning in tight spots and when you move your head less.
But bigger is not always better:
- Large windows often mean a heavier, bulkier helmet and a more expensive filter.
- For TIG, a wide view helps you see torch angle and filler placement.
- For heavy fabrication in tight spaces, a compact helmet with a good sensor layout can be better than a wide-view one.
Also check the lens position. A filter that sits close to your face and is angled well gives a wider apparent field of view; one set far away can feel like looking down a tunnel. Try the helmet on if possible and see whether the window lines up with your natural line of sight.
Comfort, Weight and Fit
Weight is easy to ignore in a shop and impossible to ignore at 3 p.m. on a long day. A heavy front-weighted helmet puts load on your neck, and a poor headgear design makes the weight worse.
Fit features worth checking:
- Headgear adjustment for crown height, tightness and tilt, so the helmet sits where you need it.
- A balanced centre of gravity, so it does not pull forward and down.
- Lift-up pivot points that hold the hood where you set it and flip down quickly.
- Padding and sweatband that you can replace, since they wear out.
- Compatibility with your safety glasses, hearing protection and, if you use one, a respirator.
Respirator compatibility deserves its own note. If your work involves fumes, your helmet must leave room for a respirator and still seal with your face properly. Check this before buying, not after. The broader question of protective equipment, including breathing protection, is part of our welding equipment guide.
Power, Batteries and Failure Behavior
ADFs are powered by solar cells, batteries or both. Each approach has tradeoffs.
- Solar-assisted with a replaceable battery is the most common and gives backup if one source is weak.
- Sealed battery designs can be convenient but may mean replacing the whole filter at end of life.
- Fully solar designs avoid battery changes but can be less reliable in dim conditions.
An important question to ask is what happens when power is lost. The relevant standard includes a power-off requirement, and quality helmets are designed so that a dead battery does not leave you with an unprotected eye. Check the manufacturer's data sheet for the helmet's behavior in a power-off state and its permanent protection level. Do not assume; verify.
Grind Mode and Extra Features
Many helmets include a grind mode, which locks the filter in its light state so you can grind with the hood down. This is convenient, but it comes with a serious warning: if you leave the helmet in grind mode and strike an arc, the lens will not darken. Make a habit of checking the mode switch whenever you pick the helmet up.
Other features you may encounter:
- Delay or fade settings control how long the lens stays dark after the arc stops, which matters when the weld pool is still glowing. Longer delays help with high-amp work; shorter delays help when you are tacking quickly.
- Magnifying lens holders (cheater lens) fit behind or in front of the filter for close work.
- Side windows widen peripheral vision, but they are not a substitute for safety glasses.
- Helmet graphics are purely cosmetic and have no safety function.
- Digital readouts and menus are convenient, but can complicate operation with gloves.
Be selective. Each added feature raises price and adds a failure point, so ask whether you will use it weekly.
Matching a Helmet to Your Welding
Different processes put different demands on the helmet. The pointers below are a starting framework rather than rules.
MIG and flux-cored
MIG and flux-cored welding usually involves moderate to high current and fairly long welds. A helmet with a variable range that includes the mid-10s and 11–12 works for most work, and a reliable sensor layout matters because the arc is bright and the position changes often.
TIG
TIG often involves low current and a faint arc. Prioritize sensitivity down to low amperage, good optical clarity and a wide view. Many TIG welders also value a lighter light-state shade, so they can see the joint clearly before striking.
Stick
Stick welding generates a bright, spattery arc and often means heavy position work. Prioritize a high top shade, a durable shell and a good delay setting, and be sure the helmet holds up in out-of-position work.
Multi-process and mixed use
If you weld in several ways, a variable-shade, multi-sensor helmet with adjustable sensitivity is the safest default. It costs more than a basic helmet, but it avoids owning several helmets for several jobs.
A hypothetical example
This is a hypothetical scenario for illustration. Imagine a home garage user who does mostly MIG on mild steel trailers, with occasional low-amp TIG on thin tubing. A fixed-shade helmet would serve the MIG side, but the TIG work would suffer. A variable-shade helmet with three or four sensors, adjustable sensitivity and a good optical rating would be a better fit, because it handles both without compromise. The same person would not need a heavy digital model with a large menu unless they weld daily.
Budget Tiers and What You Actually Pay For
Prices vary widely, and a higher price does not automatically mean better protection. What you are paying for usually falls into these buckets:
- Entry level: fixed or simple variable shade, two sensors, basic optical class. Adequate for occasional light work if it meets the relevant standard.
- Mid-range: variable shade, adjustable sensitivity and delay, three or more sensors, better optical clarity and a more comfortable headgear.
- Premium: top optical grades, wide view, true-colour presentation, advanced controls and lighter shells.
Spend where it matters for your use. If you weld a few hours a week, a good mid-range helmet is likely a sensible target. If you weld all day, the comfort and optical quality of a premium helmet can pay back in reduced fatigue. In either case, never buy a helmet that does not clearly state the standards it meets.
Standards and Markings to Look For
Look for markings that tell you which standards the helmet and filter were designed to. In the United States, regulations require employers to provide eye and face protection that meets recognized consensus standards when workers face impact, radiant or optical hazards. In Canada, helmets and hand shields fall into a class defined by the national eye and face protector standard. In Europe, filters and helmets are classified under several EN standards, with EN 379 specific to automatic welding filters.
Practical tips:
- Check the filter itself, not only the box. Filters should carry permanent markings that identify the source and shade.
- Read the data sheet for the shade range, switching time, power-off behavior and optical class.
- Buy from sources that can document compliance rather than from sellers who list standards without evidence.
- Remember that standards are periodically updated; a recent revision is not a reason to discard a compliant helmet, but it is worth asking whether the model is current.
Markings tell you what the manufacturer claims was tested. They do not replace your own pre-use checks.
Common Mistakes When Buying and Using an ADF
Avoid these frequent errors:
- Choosing by price alone and skipping standards, shade range or sensor count.
- Ignoring the shade you need for your process and amperage, then adjusting only for comfort.
- Leaving the helmet in grind mode while welding.
- Skipping safety glasses because the helmet "has a lens."
- Using scratched or spattered cover lenses, which hurt visibility and make people compensate by choosing a lighter shade.
- Never testing the sensors in the actual working position.
- Ignoring weight and fit, then wearing the helmet badly or abandoning it.
- Storing the helmet in a hot vehicle or leaving it in sunlight, which can degrade the filter and electronics.
Care and Maintenance
A helmet is protective equipment, and it needs periodic attention.
- Replace the outer cover lens when it is scratched, pitted or clouded. It is a cheap, replaceable shield that protects the more expensive filter behind it.
- Keep the inner lens and sensors clean with a soft cloth and the manufacturer's recommended cleaner.
- Check the battery and solar cells and replace the battery according to the manufacturer's schedule.
- Inspect the shell for cracks, heat damage or warping, and the headgear for worn straps or broken ratchets.
- Store it dry and cool, away from direct sun and chemicals, ideally in a bag or on a shelf.
- Test the lens before each session by striking an arc on scrap.
If anything on the helmet shows damage you are unsure about, retire it. The cost of replacement is small compared with an eye injury.
A Practical Decision Checklist
Before you buy, run through this list:
- Does the dark-state range cover my processes and amperages?
- Do I need adjustable sensitivity for low-amp TIG?
- How many sensors do I need for my positions?
- Is the optical rating documented, and is it good enough for my hours of use?
- Is the viewing area appropriate for my work and space?
- Is the helmet comfortable and balanced for long wear?
- Does it work with my safety glasses, hearing protection and respirator?
- Are standards and power-off behavior clearly documented?
- Are cover lenses and spare parts easy to buy?
- Have I budgeted for safety glasses and a spare cover lens?
If you can answer yes to most of these, you are close to the best auto darkening welding helmet for you.
Conclusion
Choosing a helmet is an exercise in matching specifications to your real work. Start with the shade range your processes require, add the optical clarity and sensor quality that your hours and positions justify, and then weigh comfort, fit and compatibility with the rest of your protective gear. Spend on the things you will notice every day, and ignore features that look impressive but rarely matter.
Whatever you buy, treat it as one layer of protection: wear safety glasses under it, test the filter before use, keep the cover lens clean and retire damaged equipment. For help choosing the other tools around your helmet, see our complete welding equipment guide.
Frequently asked questions
What is the best auto darkening welding helmet for beginners?
A variable-shade helmet with at least two sensors, adjustable sensitivity and clearly documented standards is a sound starting point. It will cover MIG, stick and most TIG work as your skills develop, and it avoids buying a second helmet later.
What shade should I use for MIG welding?
The minimum protective shade for gas metal arc welding in U.S. regulations is shade 10 for currents from 60 to 500 A, and shade 7 below 60 A. Many welders choose 10 to 12 depending on comfort and visibility, but treat these as guidance and follow your employer's requirements.
What shade is best for TIG welding?
Regulations list a minimum of shade 8 for TIG up to 150 A and shade 10 above that. The pool is often easier to see at lighter shades, but you should never go below the minimum for your current. Low-amp TIG also needs a filter with good sensitivity.
What does 1/1/1/1 mean on a welding helmet?
It is the optical-class rating under the European standard for automatic welding filters. Each of four numbers grades one optical property from 1 (best) to 3, and 1/1/1/1 means the best grade in all four. It describes optical quality, not shade range or speed.
How fast does an auto-darkening lens switch?
Quality filters switch very quickly, and the standard includes a switching-time test. Because manufacturers report speeds in different ways, compare documented figures from the data sheet and avoid relying on marketing claims.
Do I still need safety glasses under an auto-darkening helmet?
Yes. Occupational safety guidance advises wearing safety glasses or goggles with side shields even when a helmet is used, because they protect you from debris when the hood is lifted and from light and particles that reach you from the side.
What happens if the battery dies mid-weld?
It depends on the design. The standard includes a power-off requirement, and quality helmets are designed to keep protecting your eyes. Check the manufacturer's data sheet for the helmet's power-off protection and replace the battery on schedule rather than waiting for a failure.
Can I use an auto-darkening helmet for grinding?
Many helmets have a grind mode that keeps the filter light so you can see while grinding. Use it only for grinding, and always switch back to weld mode before striking an arc, because the lens will not darken in grind mode. Wear safety glasses or a face shield suitable for grinding.
Why does my lens flicker or fail to darken?
Common causes are blocked sensors, low sensitivity settings, a very low-amp arc, a dirty or scratched cover lens, or a weak battery. Clean the lens, adjust sensitivity, check the battery and test on scrap. If it still misbehaves, stop using the helmet until it is serviced or replaced.
How often should I replace the cover lens?
Replace it when it is scratched, pitted or covered in spatter that you cannot clean off, since it affects visibility and the shade you choose. For frequent welders that can mean every few weeks; for occasional users, much less often.
Is a more expensive helmet always safer?
Not necessarily. Safety depends on meeting the relevant standards, using the correct shade and keeping the helmet in good condition. Higher prices usually buy better optics, comfort and features, which matter for long sessions, but a compliant mid-range helmet that you maintain properly is a safe choice.
References
- Canadian Centre for Occupational Health and Safety, Welding - Personal Protective Equipment and Clothing - CCOHS, accessed 2026-11-01.
- Occupational Safety and Health Administration, 1910.133 - Eye and face protection - U.S. Department of Labor, accessed 2026-11-01. Filter lens shade table.
- Occupational Safety and Health Administration, 1910.252 - General requirements (welding, cutting and brazing) - U.S. Department of Labor, accessed 2026-11-01.
- American Welding Society, Welding Lens Shade Chart: Numbers and Eye Protection - Welding Digest, AWS, 2025.
- CEN, EN 379:2003 Personal eye-protection - Automatic welding filters - European Committee for Standardization, 2003.
- American Welding Society, ANSI Z49.1 Safety in Welding, Cutting, and Allied Processes - AWS, 2012.