
How to Weld Stainless Steel with TIG: Purging and Heat Tint
TIG welding stainless steel: control heat input, back purge the root, read heat tint colours and fix common problems for clean, corrosion-resistant welds.

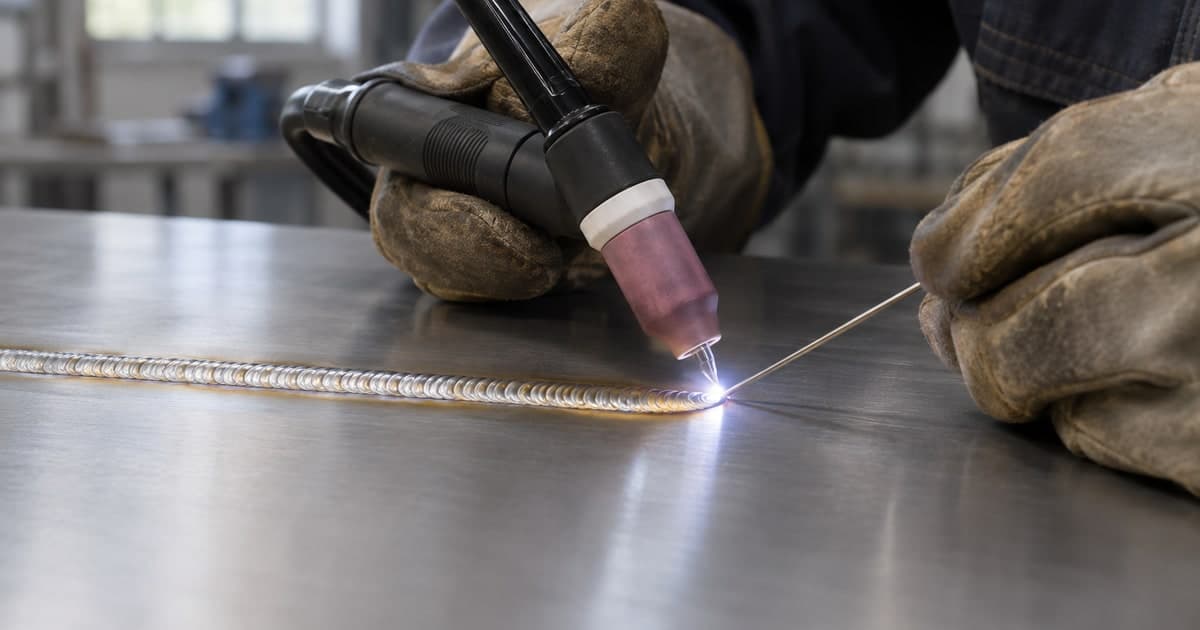
TIG welding stainless steel gives you more control than most other processes, but it punishes careless heat. The arc is precise and the puddle is easy to see, so a good weld can look excellent. A weld that runs too hot, however, loses the corrosion resistance that made the stainless part worth making in the first place.
This guide covers the three things that decide the result: how much heat you put in, how well you protect the back of the weld, and how to read the colour of the bead. Once you can judge those, the rest of the technique follows.
Why Stainless Behaves Differently
Stainless steel welds much like mild steel, but it leaves you less margin. It expands more when heated and conducts heat away from the weld more slowly. The base metal therefore distorts more easily, and the weld itself is more likely to overheat because the surrounding metal does not pull heat away as quickly.
The practical goal is the lowest heat that still fuses the joint. If a stainless part moves or warps, the cause is usually too much heat applied for too long, not a poor setup. Plan the order of your passes so the heat is spread across the part.
If you are not yet sure which grade you are working with, the 304 vs 316 stainless welding comparison explains how the two grades respond to heat, which affects how carefully you need to work.
Setting Up the Process
For stainless, start with a sharp tungsten and straight polarity (DCEN). The tungsten you choose matters too, and the tungsten electrode types guide explains which tips suit thin material and which suit thicker sections.
Amperage depends on thickness and joint type. A setting table in the OpenWA GTAW chapter, excerpted from a torch manufacturer's reference, lists 80 to 100 amps for a 1/16 inch (1.6 mm) butt joint on stainless with argon, and 120 to 140 amps for a 1/8 inch (3.2 mm) butt joint. Treat those figures as a starting point and confirm them on scrap before you weld the real part.
For a wider view of how amperage relates to thickness, the TIG welding amperage chart is a useful companion. Use it to find the range, then trim it during your test beads.
Choosing the Shielding Gas
Argon is the gas used throughout the OpenWA stainless examples. It protects the molten puddle and the hot tungsten from the air. The flow rate needs to match the cup size and the joint, because too little flow lets air in, and too much can create turbulence that draws air in from the sides.
Back Purging: Protecting the Root
The back side of a stainless weld oxidises when it is hot, even if the front is well shielded. Oxidation on the root can leave a rough, sugary surface and reduces corrosion resistance, so the back needs its own protection on joints where the root is exposed or the part must resist corrosion.
Many shops use a purge block for this. The OpenWA GTAW chapter shows a purge block in use. The principle is simple: displace the air at the back of the joint with inert gas while the weld cools. A bracket or decorative panel may not need a full purge, but pipe and parts that will sit in a corrosive environment usually do.
A few practical points help. Seal the ends of the joint, keep the purge gas flowing until the weld has cooled enough that it no longer oxidises, and avoid moving the part while the gas is still needed. If you cannot purge, reduce the heat and plan on cleaning the root afterwards.
Reading Heat Tint
Heat tint is the colour that forms on the surface beside the weld as the oxide film thickens. It is the most useful feedback you have, because it shows how much heat went into the joint. The oxide layer also affects corrosion resistance, so the colour matters beyond appearance. Stainless resists corrosion because of its chromium. When the weld overheats, chromium migrates toward the surface and oxidises, and the zone beneath can be left depleted in chromium, behaving more like carbon steel. A supplier's explanation of this mechanism is listed in the references.
The OpenWA GTAW chapter describes three ranges worth learning:
- Gold or straw: the colour you are aiming for. It indicates proper heat input.
- Purple and blue: the weld is getting too hot. Reduce current or increase travel speed on the next pass.
- Grey: the weld has been overheated. It has lost corrosion resistance, so it needs more heat control or, on critical parts, removal and rewelding.
Use the colour as a guide to adjust technique, not as a score. A bead that is gold on one side and blue on the other usually points to uneven travel speed or a torch angle that changes along the seam.
Removing Heat Tint After Welding
Heat tint can be removed by mechanical cleaning or chemical treatment. Mechanical methods include grinding and wire brushing, while pickling pastes and passivation solutions are common in workshops. Each method trades cost, labour and the risk of leaving contamination behind.
If you clean with a wire brush, use one dedicated to stainless. A brush that has been used on mild steel can leave iron particles on the stainless surface, and those particles can rust and spoil the finish. Label brushes by material and store them apart.
For critical parts, cleaning and passivation are part of the job. Follow the specification for the part and check the surface after treatment.
Filler Metal and Joint Preparation
Stainless comes in many alloys, so the filler should match the base metal or suit the application. The OpenWA chapter points welders to a filler selector list, and that check is worth doing before you strike the arc.
Tight fit-up matters more on stainless than on mild steel because the metal distorts more easily. Bring the edges close, tack the joint in several places, and check that the gap is consistent along the seam. Where you do leave a gap, the filler has to bridge it, so keep the gap about the diameter of the filler rod.
Clean the joint thoroughly. The OpenWA chapter recommends a stainless wire brush used only on stainless, and an acetone wipe with a lint-free rag. Wipe the filler rod as well, because dirty filler can cause porosity.
Controlling Distortion
Distortion is the usual complaint with stainless. The steel expands more when hot and shrinks more as it cools, which pulls the parts out of shape. The safest approach is to reduce the total heat added and spread it evenly across the joint.
The OpenWA chapter suggests a simple test. Weld a butt joint on scrap without tacking one side, and watch the parts pull together or overlap. Tack in several places before welding for the real part, so the joint tension does not run in one direction. Use short stitches, let the part cool between passes, and alternate sides when the design allows.
Keep clamps and fixtures on until the metal has cooled. Releasing a hot joint can let it spring out of position.
Common Problems and Fixes
Blue or purple beads. These mean too much heat. Reduce amperage in small steps, increase travel speed, and tighten the arc. A dull grey bead means the heat was higher than the joint needed.
Sugary or rough root. The back of the weld was probably not protected. Improve the purge, reduce heat, or plan to clean the root afterwards.
Porosity. Check the base metal, the filler and the gas supply for contamination. A leak in the gas line or a dirty cup can also cause it.
Burn-through on thin sheet. Lower the amperage, increase travel speed, and make sure the joint is tight, because a wide gap on thin sheet is a common cause of holes.
Discoloured tungsten. A dirty or oxidised tungsten can contaminate the weld. Re-grind or replace it, and check that post-flow is long enough to protect the tungsten as it cools.
Safety When Welding Stainless
Ventilation matters. Work in an area with good airflow, use local extraction where you can, and keep your head out of the fume plume. Follow the safety data sheet for the filler metal and for any cleaning chemicals you use.
The arc gives off intense ultraviolet light, so wear a helmet with the correct shade and cover exposed skin. Keep the gas cylinder secured, because a leak in an enclosed space can displace oxygen.
Acids used for pickling and passivation are hazardous. Store them properly, wear the protective equipment their data sheet recommends, and dispose of waste according to local rules.
A Simple Practice Routine
Practise on scrap of the same grade and thickness as your real work. Start with a bead on plate without filler, look at the heat tint, and adjust until the colour is gold or straw. Then add filler and make a butt joint with a tight fit-up.
Next, practise purging. Weld a pipe or a box section with and without back protection, and compare the roots. Keep notes on amperage, gas flow and travel speed for each test, because those notes become your reference for the next job.
Putting It All Together
Good TIG welding on stainless comes down to three habits: keep the heat low, protect the back of the weld, and read the colour of the bead. The equipment matters, but the habits matter more.
Use heat tint as your guide, test on scrap before the real part, and clean and passivate where the job requires it. Over time, the colour will tell you what your settings are doing, and that feedback makes you a more consistent welder.
Frequently asked questions
What shielding gas is used for TIG welding stainless steel?
The OpenWA GTAW examples use argon for stainless, protecting the puddle and the tungsten from the air. Match the flow rate to the cup size and the joint.
Why does my stainless weld turn blue or purple?
That colour is heat tint, an oxide film that forms when the weld gets too hot. Reduce current or increase travel speed on the next pass.
What does a grey weld on stainless mean?
A grey bead shows the weld has been overheated. It has lost corrosion resistance and usually needs more heat control, or rewelding on critical parts.
Do I always need back purging?
Not for every job. Pipe and parts exposed to corrosion, or where the root must be clean, usually need it. For decorative or non-critical work, reducing heat may be enough.
How do I remove heat tint after welding?
Heat tint can be removed by grinding, wire brushing or chemical pickling and passivation. Use a brush reserved for stainless, because iron particles from mild steel can rust on the surface.
Why does stainless distort more than mild steel?
Stainless expands more when heated and conducts heat away more slowly. Use short stitches, balanced sequences and tight fit-up to limit movement.
What amperage should I start with for a thin stainless butt joint?
The OpenWA GTAW chapter lists 80 to 100 amps for a 1/16 inch (1.6 mm) butt joint with argon. Use that as a starting point and adjust on scrap, because the right setting depends on the machine and the joint.
Do I need to worry about fume when welding stainless?
Yes. Use good ventilation or local extraction, keep your head out of the plume, and follow the safety data sheet for the filler metal and any cleaning chemicals.
References
- Karl Fulton, GTAW Operation and Welding Techniques - Welding Theory Fundamentals, OpenWA, accessed 2026-11-16.
- Gas Tungsten Arc Welding (GTAW) - Introduction to Welding, OpenWA, accessed 2026-11-16.
- Wiley Metal, Good vs. Bad: What You Need to Know About Colored Welds - Wiley Metal (supplier), accessed 2026-11-16. Supplier source, used only for the explanation of chromium depletion under heat tint.