
What Is TIG Welding?
Learn what TIG welding is, how it works, the equipment you need, and beginner-friendly tips to weld cleaner, stronger joints with confidence.

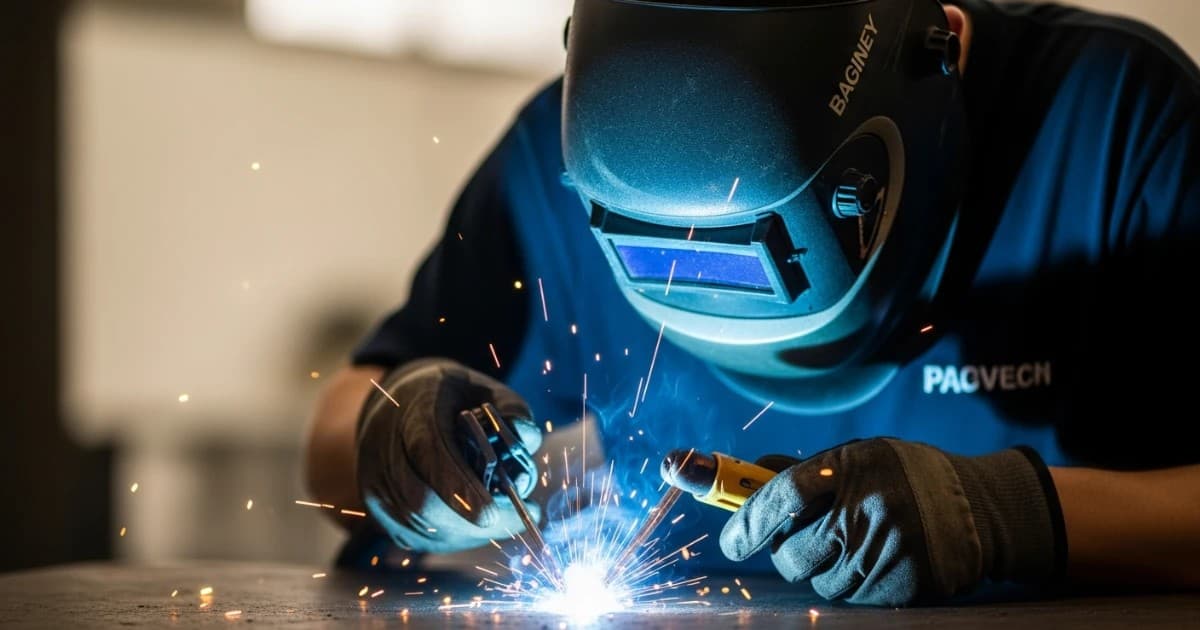
If you've ever looked closely at a stainless-steel handrail, a titanium bike frame, or the exhaust system on a high-end car and wondered how the seams look so clean, you were probably looking at TIG welding. TIG welding (short for Tungsten Inert Gas welding) is the process welders reach for when a job demands precision, control, and a finish that doesn't need to be ground or hidden. It's slower than other methods and it takes more coordination to learn, but nothing else produces welds quite as clean or as strong on such a wide range of metals.
This guide breaks down exactly what TIG welding is, how the process actually works, what equipment you need to get started, and the mistakes that trip up almost every beginner. By the end, you'll understand not just the theory but what it actually feels like to strike an arc and lay down a bead — and whether TIG is the right process for you to learn first.
What Is TIG Welding, Exactly?
TIG welding is a welding process that uses a non-consumable tungsten electrode to create an electric arc between the torch and the metal you're joining. That arc generates intense, concentrated heat — hot enough at its core to melt metal almost instantly — which the welder uses to form a molten puddle. If the joint needs extra material, the welder manually feeds a separate filler rod into that puddle, one hand on the torch and the other guiding the rod.
The whole process is shielded by a continuous flow of inert gas, almost always argon, which pushes oxygen and other atmospheric contaminants away from the weld pool while it's molten. Without that shielding, the metal would oxidize and the weld would be riddled with weaknesses. In technical and industrial settings, you'll also see TIG welding called GTAW, or Gas Tungsten Arc Welding — same process, different name, and you'll hear both used interchangeably depending on where you learned the trade.
What sets TIG apart from almost every other welding method is that the electrode never becomes part of the weld. In stick or MIG welding, the electrode or wire melts and becomes filler metal. In TIG welding, the tungsten just sustains the arc — it's the welder's hands, not the machine, that decide exactly how much filler goes where. That's what gives TIG its reputation for control, and it's also exactly why it takes longer to learn.
Why TIG Welding Is Worth Learning
Most people come across TIG welding because they've hit a wall with another process. Maybe a MIG weld on thin aluminum kept blowing through, or a stick weld on stainless left a bead too rough to pass inspection. TIG solves those problems because it gives the welder independent control over heat, filler, and arc length — three variables that other processes bundle together or automate away.
That control is exactly why TIG dominates in fields where a weld's appearance and integrity both matter: aerospace components, food-grade and medical stainless equipment, motorsport chassis and exhaust work, custom fabrication, and fine metal art. If you're a hobbyist, learning TIG opens up bicycle frames, motorcycle parts, thin-gauge sheet metal, and aluminum projects that other processes handle poorly. If you're aiming for professional welding work, TIG certification tends to pay well precisely because fewer welders have put in the hours to master it.
How TIG Welding Actually Works
Understanding TIG welding in theory is easy. Understanding what your hands need to do at the same time is the real learning curve. Here's the process broken into its actual working parts.
The Arc and the Tungsten Electrode
The torch holds a sharpened tungsten rod in a collet, and current flows from the machine, through the tungsten, and across a small air gap to the base metal — that gap is where the arc forms. Tungsten was chosen for this job because it has one of the highest melting points of any metal, which lets it sustain an arc without melting away itself. You're not welding with the tungsten; you're welding because of the arc it creates.
Shielding Gas
Pure argon is the standard shielding gas for almost all TIG work, typically run at 15–20 cubic feet per hour through a cup on the end of the torch. Argon is denser than air, so it blankets the weld pool and keeps oxygen and nitrogen out while the metal is molten. For thicker material or when faster travel speeds and deeper penetration are needed, some welders switch to an argon-helium blend, since helium burns hotter — but for a beginner, straight argon is the right starting point on nearly everything.
Filler Metal
Filler rods come in various diameters and alloys matched to the base metal — stainless filler for stainless, aluminum filler for aluminum, and so on. Not every TIG weld needs filler at all. On thin material with a tight-fitting joint, a welder can fuse the two pieces using only the base metal itself, a technique called autogenous welding. When filler is needed, it's dipped into the leading edge of the puddle in a steady rhythm, never touching the hot tungsten, which is the single habit that takes beginners the longest to build.
Power Source: AC vs. DC
This is where a lot of beginners get confused, so it's worth being direct about it: the polarity you choose depends entirely on the metal.
- DC (direct current): Used for steel, stainless steel, titanium, copper, and most other metals. It concentrates heat into the base metal for deep, controlled penetration.
- AC (alternating current): Used for aluminum and magnesium. Aluminum forms a tough oxide layer almost instantly on contact with air, and AC's polarity switching actively breaks up that oxide during welding — something DC alone can't do effectively.
If aluminum is anywhere in your future plans, buy a machine with AC/DC capability from the start. Retrofitting isn't an option — it's a different circuit design, not a setting you can bolt on later.
TIG Welding Equipment You'll Need
A complete TIG setup has more moving parts than a MIG rig, but none of it is exotic. Here's what a beginner actually needs on the bench.
- TIG welder/power source: An inverter-style machine with at least 150–200 amps of output, ideally AC/DC if aluminum is on your list.
- TIG torch: Air-cooled for lighter, hobbyist-level amperages; water-cooled for higher amperage or long production runs where heat builds up in the torch.
- Tungsten electrodes: Sized to your amperage range, sharpened to a point for DC work or balled slightly for AC.
- Filler rods: Matched to the base metal you're joining.
- Shielding gas and regulator: A tank of pure argon with a flow-rate regulator.
- Foot pedal or torch-mounted amperage control: Lets you raise and lower heat in real time without touching a dial.
- Safety gear: An auto-darkening welding helmet, leather or TIG-rated gloves, a flame-resistant jacket, and safety glasses.
Tungsten electrodes deserve special attention because the wrong choice quietly ruins a lot of beginner welds. Electrodes are color-coded by their alloy blend, and each type behaves differently:
- Green (pure tungsten): A traditional choice for AC aluminum welding, though it carries less current than blended types.
- Red (thoriated): Long a popular all-around choice for DC work with easy arc starts, though its mild radioactivity has pushed many shops toward alternatives.
- Blue (lanthanated): A genuinely all-purpose electrode that starts easily and stays stable across a wide amperage range on both AC and DC.
- Gold (lanthanated, lower percentage): Similar benefits to blue, suited to both AC and DC.
- Grey (ceriated): Favored for low-amperage, precision work on thin material.
- White (zirconiated): Built for higher-current AC welding on aluminum and magnesium, with good resistance to contamination.
For a beginner who wants one electrode that handles most situations without much fuss, lanthanated tungsten is the safest starting point.
TIG Welding vs. MIG and Stick Welding
Nearly every beginner asks the same question before buying equipment: should I just start with MIG instead? Here's the honest comparison.
- Learning curve: MIG's automatic wire feed removes one variable from the process, so beginners often produce acceptable welds within hours. TIG asks you to coordinate torch angle, arc length, filler feed, and heat control simultaneously — it typically takes weeks of deliberate practice before it feels natural.
- Speed and production: MIG is considerably faster and better suited to long production runs or thicker structural work. TIG's deliberate pace makes it a poor fit for high-volume jobs but ideal for precision pieces.
- Weld appearance: TIG produces the cleanest, most controlled bead of any common process, with no spatter and minimal cleanup. MIG welds are functional but often need grinding for a finished look.
- Material versatility: One TIG machine can weld steel, stainless, aluminum, titanium, copper, and magnesium. MIG covers steel, stainless, and aluminum but needs different wire and setup changes for each.
- Where stick fits in: Stick welding remains the toughest, most portable option for outdoor, rusty, or dirty metal — conditions where TIG's sensitive shielding gas simply can't survive a breeze.
A practical way to think about it: MIG is the process most beginners learn first because it's forgiving and fast. TIG is the process most welders eventually want to learn because it's the one that produces work they're proud to show off.
Benefits of TIG Welding
- Exceptional precision: Independent control over heat and filler means tight tolerances and clean, consistent beads.
- Minimal cleanup: No slag, little to no spatter, and often no post-weld grinding needed.
- Works on thin material: TIG can join sheet metal and thin-wall tubing that would blow through under MIG or stick.
- Broad material range: One machine handles carbon steel, stainless, aluminum, titanium, copper, and more.
- Strong, high-integrity welds: The narrow, focused arc gives excellent fusion, which is why TIG is trusted in aerospace and pressure-vessel work.
- Cleaner working environment: When the base metal is clean, TIG produces very little smoke compared with other arc processes.
Drawbacks and Limitations
- Slower than MIG or stick: The two-handed technique and lower deposition rate make TIG impractical for large-volume production work.
- Steeper learning curve: Coordinating torch angle, filler feed, arc length, and pedal control at the same time takes real practice before it feels natural.
- More expensive per finished weld: Slower speeds mean more labor time, which raises the effective cost compared with MIG on the same job.
- Sensitive to wind and contamination: The shielding gas is easily disrupted outdoors, and any dirt, oil, or rust on the base metal shows up immediately as a flawed weld.
- Less ideal for thick structural steel: Other processes deposit more metal faster on heavy sections where appearance matters less than throughput.
Who Should Learn TIG Welding (and Who Might Skip It For Now)
TIG is a strong fit if you work with thin metal, aluminum, or stainless; you care about how the finished weld looks; you're building toward aerospace, motorsport, or fabrication work; or you simply enjoy the more deliberate, hands-on nature of the process. Artists, custom fabricators, and anyone restoring vintage vehicles tend to gravitate toward TIG for exactly these reasons.
TIG might be a bad fit right now if you need to join thick structural steel quickly, you're working outdoors where wind will scatter your shielding gas, or you want to be productive with a welder within your first afternoon. In those cases, learning MIG or stick first — and adding TIG later once you have basic arc-welding instincts — is usually the more practical path.
Getting the Settings Right: Amperage, Polarity, and Gas Flow
There's no single amperage chart that fits every machine, joint, or welder's technique, but a few rules of thumb give beginners a reliable starting point:
- Mild steel: A common starting rule is roughly 1 amp for every 0.001 inch of material thickness, run on DC.
- Stainless steel: Run slightly lower amperage than mild steel of the same thickness, since stainless carries heat differently and is more prone to warping.
- Aluminum: Needs noticeably more amperage than steel of the same thickness — often around 1.2 amps per 0.001 inch — and always runs on AC to break down the oxide layer.
- Gas flow: 15–20 cubic feet per hour of pure argon is the standard range; too little invites porosity, too much can actually pull outside air into the weld through turbulence.
Treat these as a starting point, not gospel. Machine output, joint fit-up, welding position, and your own travel speed all shift the ideal number. The fastest way to dial in settings is to run a test bead on scrap of the same thickness and alloy before touching the real workpiece — professionals do this on every new job, not just beginners.
Common Beginner Mistakes (and How to Avoid Them)
- Wrong torch angle: Too steep or too flat distorts the puddle and weakens fusion. Aim for the torch tilted roughly 10–20 degrees off vertical, which puts it at about a 70–80 degree angle to the workpiece — steady and consistent beats "correct on paper."
- Dipping the tungsten in the puddle: Touching the tungsten to the molten metal contaminates the electrode instantly, causing arc wander and black inclusions in the weld. The moment this happens, stop, re-sharpen or replace the tungsten, and don't try to weld through it.
- Finishing too fast: Pulling the torch away the instant the weld looks done leaves a crater prone to cracking and porosity. Ease off the pedal gradually and hold the gas flowing a beat or two after the arc goes out, until the red glow fully fades.
- Inconsistent filler feed: Jerky or irregular dipping shows up immediately as an uneven, lumpy bead. Slow, steady, rhythmic dipping — timed with your torch travel — is what produces a stacked-dime look.
- Skipping metal prep: Oil, mill scale, oxide, or even fingerprints on aluminum will show up as porosity or discoloration. Clean the joint and filler rod immediately before welding, every time.
- Wrong or dirty shielding gas flow: Too little flow lets oxygen in; too much creates turbulence that does the same thing. Welding near open doors or fans causes the identical problem even at perfect flow settings.
Best Practices for Learning TIG Welding
Nobody produces a clean TIG bead on their first attempt, and that's normal. A practical learning progression looks like this:
- Practice striking and holding a stable arc on scrap steel before ever introducing filler rod.
- Move on to "puddling" — moving the torch in a steady pattern without filler — to build control over travel speed and arc length.
- Add filler rod once your puddle control is consistent, focusing on rhythm rather than speed.
- Practice on butt joints and lap joints in flat position before attempting vertical or overhead welds.
- Move to thinner material and aluminum only once your technique on mild steel is repeatable.
A few setup habits make this progression much easier. Elevate your workpiece on blocks so you're not hunched over the table — visibility and comfort matter more than beginners expect. Rest your torch hand against the bench or use a finger as a glide point to steady your travel. And if your machine has a foot pedal, use it from day one rather than relying on a fixed amperage dial; real-time heat control is one of TIG's biggest advantages, and it's a habit best built early rather than retrofitted later.
Safety: What Every TIG Welder Needs to Know
TIG welding has a reputation for being "cleaner" than other processes, and in terms of visible smoke, that's often true. But clean-looking doesn't mean risk-free, and a few hazards deserve real respect.
- UV and infrared radiation: The TIG arc emits intense ultraviolet and infrared light — enough to cause "arc eye" and skin burns similar to severe sunburn, often faster than actual sun exposure. A properly rated auto-darkening helmet and fully covered skin are non-negotiable, not optional.
- Ozone formation: Because TIG produces less visible smoke than MIG or stick welding, the UV radiation is less obstructed and can generate more ozone in the surrounding air. Good ventilation matters even when you don't see fumes rising.
- Metal fumes: Welding on coated, painted, galvanized, or chemically treated metal releases fumes that are genuinely hazardous to breathe, regardless of process. Always clean coatings off the weld area first and work with adequate airflow or extraction.
- Electric shock and burns: Standard arc-welding precautions apply — dry gloves, dry footing, and a machine that's properly grounded.
- Compressed gas handling: Argon cylinders should be secured upright, transported carefully, and fitted with a proper regulator before use.
None of this should be treated as scare-mongering — TIG welding is done safely every day in shops and garages around the world. The point is simply that "low smoke" doesn't mean "low hazard," and the same PPE discipline that applies to any welding process applies here too.
Real-World Uses of TIG Welding
TIG welding shows up wherever the finished weld needs to be both structurally sound and visually clean. A few common scenarios illustrate the range:
- Automotive exhaust systems and roll cages: Thin-wall tubing and a visible finish make TIG the standard choice in performance and race-car fabrication.
- Aerospace components: Where weld integrity is directly tied to safety, TIG's control and consistency make it the process of choice for critical joints.
- Bicycle and motorcycle frames: Thin, often exotic tubing (steel, titanium, aluminum) needs the precise heat control TIG provides to avoid warping or burn-through.
- Food, beverage, and medical equipment: Stainless steel tanks, piping, and fixtures need smooth, contaminant-free welds that TIG delivers without extra grinding.
- Metal art and sculpture: Artists favor TIG for the same reason fabricators do — total control over bead placement and appearance.
- Pipe welding: Root passes on critical pipe joints are frequently TIG welded even when the rest of the joint is filled with a faster process, because the root pass is where leak-tight integrity matters most.
Common Misconceptions About TIG Welding
Misconception: TIG welding produces zero fumes. Reality: it produces less visible fume than MIG or stick on clean base metal, but coated, painted, or dirty metal still releases hazardous fumes regardless of process.
Misconception: TIG is only useful for aluminum. Reality: aluminum is where TIG shines brightest, but it's equally capable — often superior — on stainless steel, titanium, copper, and thin mild steel.
Misconception: Beginners can't realistically learn TIG. Reality: it takes longer than MIG to feel natural, but it's absolutely learnable with consistent practice — plenty of hobbyists teach themselves in a home garage.
Misconception: A more expensive machine guarantees better welds. Reality: technique, clean metal, and correct settings matter far more than machine price once you're above entry-level quality. A mid-range machine in skilled hands will consistently outweld an expensive one in inexperienced hands.
How Much Does It Cost to Get Started?
Budget is often the deciding factor for beginners, so here's a realistic breakdown rather than a single number. Basic DC-only inverter machines can be found at the low end of the market, suitable for steel and stainless practice but not aluminum. Capable AC/DC inverter machines with dual voltage (120V/240V) and pulse features sit in the mid-range and are the better long-term choice if aluminum is anywhere in your plans, since AC/DC capability can't be added after the fact.
Beyond the machine itself, factor in tungsten electrodes (sold in small multi-packs and consumed gradually), filler rod matched to your metal, an argon tank and regulator (often rented or purchased through a local gas supplier), and non-negotiable safety gear — an auto-darkening helmet, gloves, and a flame-resistant jacket. A complete, functional beginner setup — machine, consumables, gas, and PPE — typically lands somewhere in the range of several hundred to a few thousand dollars depending on machine quality and whether you already own compatible safety gear. It's a real investment, but the machine and PPE are largely one-time costs; ongoing expenses are mostly gas refills and consumables.
Final Thoughts
TIG welding rewards patience. It's not the process to reach for if you need to join heavy steel in a hurry, and it will test your coordination in the first few weeks in a way MIG welding simply doesn't. But that same demand for control is exactly what makes TIG welds look — and hold up — the way they do. Once the torch angle, filler rhythm, and pedal control start to feel automatic rather than deliberate, you gain access to materials and finishes that other processes can't reliably match.
If you're serious about starting, the path is straightforward: get a machine that matches the metals you actually want to weld, invest in real safety gear from day one, and spend your first hours building puddle control on scrap steel before you ever touch aluminum or a finished project. The learning curve is real, but so is the payoff — a TIG welder who's put in the practice can join almost anything, and make it look like it was never welded at all.