
What Is Stick Welding?
Learn what stick welding (SMAW) is, how it works, which electrodes to choose, and how to avoid the mistakes that trip up most beginners.

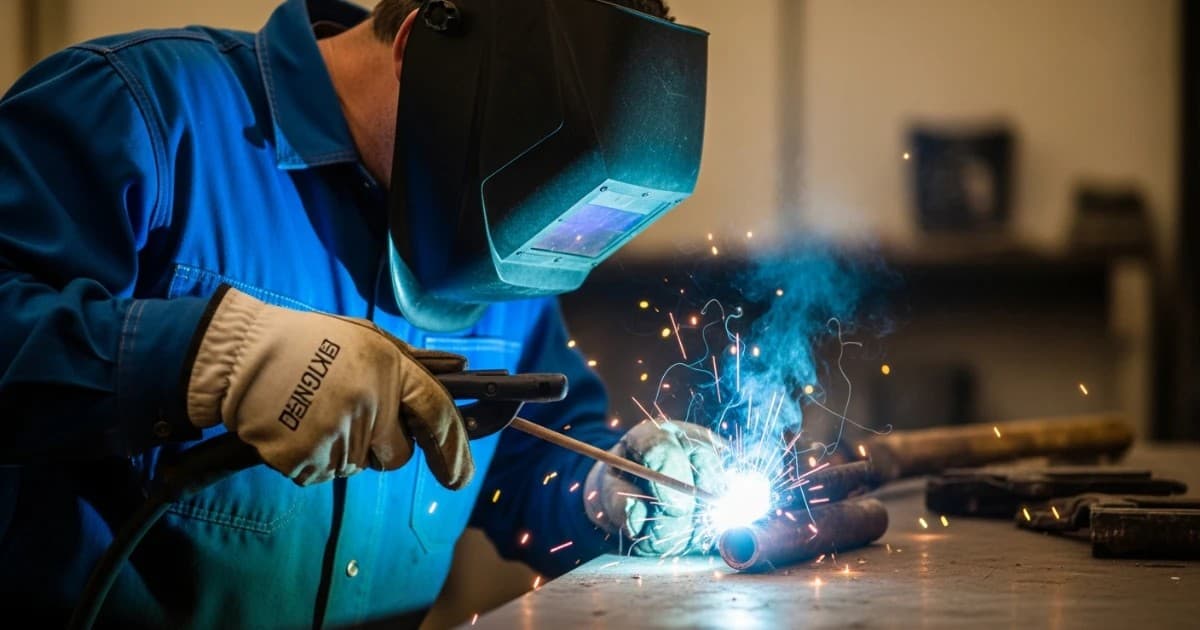
If you've ever seen a farmer patch a broken gate, a pipeline crew join sections in the middle of a field, or a shipyard welder working inside a hull with no power outlet in sight, there's a good chance stick welding was the process doing the work. Stick welding, known formally as shielded metal arc welding (SMAW), is an arc welding process that melts a flux-coated metal rod into a joint, using nothing but electricity, the electrode itself, and the surrounding air chemistry the flux creates to protect the weld. It's one of the oldest arc welding methods still in daily industrial use, and for a lot of beginners, it's also the cheapest and most forgiving way to learn how to join metal.
This guide covers what stick welding actually is, how the process works at the arc, which electrodes to use and why, the equipment you'll need, the mistakes that trip up almost every beginner, and the safety realities that matter more than most first-timers expect. By the end, you should be able to walk into a welding supply store, ask for the right rod, and understand exactly why you're asking for it.
What Stick Welding Actually Is
Stick welding gets its name from the electrode: a straight metal rod, usually 12 to 18 inches long, coated in a layer of mineral and chemical flux. Clamp it in an electrode holder, touch it to grounded metal, and an electric arc jumps between the rod and the workpiece. That arc is hot enough to melt both the steel core of the rod and the base metal beneath it, fusing them into a single joint as the rod deposits filler metal into the weld pool.
What makes SMAW different from wire-fed processes like MIG welding is that there's no separate shielding gas cylinder and no continuously fed spool. The electrode itself carries everything needed to protect the weld: as the flux coating burns in the arc, it releases a shielding gas that pushes atmospheric oxygen and nitrogen away from the molten pool, while also forming a layer of slag that solidifies over the bead and continues protecting it as it cools. Chip that slag off once the weld cools, and you're left with the finished joint underneath.
How the Arc, Flux, and Slag Work Together
Striking the arc happens almost like lighting a match: the electrode tip touches the workpiece, creating a brief short circuit, and as it's pulled back a fraction of an inch, the electricity arcs across the gap instead of stopping. That arc reaches roughly 6,500°F (3,600°C), hot enough to melt the steel core of the electrode and the surface of the base metal almost instantly.
Three things happen at the same moment once the arc is stable:
- The electrode's steel core melts and transfers across the arc as filler metal, building up the weld bead.
- The flux coating burns and vaporizes, generating a shielding gas envelope around the arc that keeps oxygen and nitrogen from contaminating the molten pool. Without this shielding, the weld would absorb atmospheric gases and turn brittle and porous.
- A layer of slag forms on top of the cooling weld, insulating it so it cools more slowly and evenly, which reduces cracking, and also scavenging some impurities out of the molten metal.
That third step is the one beginners notice most, because it means every pass has to be chipped and wire-brushed clean before the next pass goes down. It's extra labor MIG welders don't deal with, but it's also part of why stick welding tolerates dirtier working conditions than gas-shielded processes: the flux is doing active chemical work, not just physically blocking air the way a shielding gas does.
Why Stick Welding Still Matters
Wire-fed processes are faster and cleaner in a shop, so it's fair to ask why SMAW hasn't been retired. The answer is environmental tolerance. Because the shielding comes from the electrode's own flux rather than a gas cylinder, stick welding works outdoors in wind that would blow a MIG welder's shielding gas away entirely, and it tolerates rusty, painted, or mill-scaled steel far better than gas-shielded processes do.
That's why SMAW remains the default for pipeline tie-ins, structural steel erection, agricultural repair, shipbuilding, and maintenance welding on equipment that's been sitting outside for years. It also requires the least equipment of any arc welding process: a power source, cables, an electrode holder, a ground clamp, and a box of rods. There's no gas regulator to haul around, no wire liner to clog, and the machines themselves tend to be simpler and more rugged, which is part of why a basic stick welder is often the most affordable entry point into welding for a beginner working with a limited budget.
The Equipment You Actually Need
A complete stick welding setup is short and simple:
- A power source. This can be a transformer machine (AC only or AC/DC), or a modern inverter-based welder, which is smaller, lighter, and gives more precise arc control than older transformer designs.
- An electrode holder to clamp the rod and carry current into it.
- A work clamp (ground clamp) that completes the circuit back to the power source. It must have solid metal-to-metal contact with the workpiece, not just the paint or rust on the surface.
- Welding cables rated for the amperage you'll be running.
- Electrodes matched to the base metal, joint type, and welding position.
- Personal protective equipment, covered in detail later, including a welding helmet, gloves, and flame-resistant clothing.
Most home-shop machines run comfortably between 30 and 150 amps, which covers everything from thin sheet metal repairs up through 1/4-inch to 3/8-inch structural steel, depending on the electrode and technique.
Understanding Electrodes: The AWS Numbering System
Every common stick electrode carries a code like E6011, E6013, or E7018, and that code isn't arbitrary. It follows the American Welding Society's A5.1 specification for carbon steel covered electrodes, and once you can read it, choosing the right rod stops being guesswork.[1]
- The first two digits (60, 70) indicate minimum tensile strength in thousands of pounds per square inch. E7018 deposits weld metal rated at 70,000 psi minimum; E6013 is rated at 60,000 psi.
- The third digit indicates welding position. A "1" means the electrode can run in all positions: flat, horizontal, vertical, and overhead. A "2" is typically limited to flat and horizontal.
- The fourth digit describes the coating type and the current the electrode is designed for, which determines arc characteristics, penetration depth, and slag behavior.
A few electrodes cover most beginner needs:
- E6010: Deep-penetrating, DC-only rod that digs through rust, paint, and mill scale. Common in pipeline and repair work, but produces an aggressive arc that takes practice to control.
- E6011: Similar penetration to E6010, but runs on AC or DC, making it useful when only an AC machine or a generator is available. A common choice for farm and maintenance repair on dirty steel.
- E6013: A smoother, easier-to-control arc with lighter penetration, good for thin material and general fabrication where bead appearance matters. Widely recommended as a first electrode for beginners because it's forgiving of imperfect technique.
- E7018: A low-hydrogen electrode that produces strong, crack-resistant welds and is specified in most structural and pressure-vessel welding codes. It runs cleaner than E6010 or E6011 but requires the coating to be kept dry, since moisture in a low-hydrogen coating can introduce hydrogen into the weld and cause cracking.
Rod diameter matters as much as type. A rough rule of thumb is about one amp of current per thousandth of an inch of electrode diameter, so a 1/8-inch (0.125 in) rod runs at roughly 110–140 amps depending on the specific electrode and position.
AC vs. DC: Choosing Polarity
Stick welders run on alternating current (AC), direct current electrode positive (DCEP, also called reverse polarity), or direct current electrode negative (DCEN, straight polarity). The choice affects arc stability, penetration, and which electrodes will even strike properly.
DC generally produces a smoother, more stable arc than AC, and most electrodes, including E7018 and E6010, are designed to run on DCEP for the best penetration and bead control. AC is useful specifically because a small number of electrodes, notably E6011 and E6013, are formulated to run on either AC or DC, which makes AC-only machines usable and keeps entry-level equipment costs down. AC also has one practical advantage in thicker material: it largely eliminates arc blow, a phenomenon where magnetic fields built up in the workpiece deflect the arc away from the joint, something that shows up more often with DC welding near corners, in deep grooves, or on thick, magnetized steel.
If cost allows only one machine, an AC/DC inverter gives the most flexibility. If budget is the deciding factor, an AC-only machine paired with AC-rated rods like E6011 or E6013 is a legitimate way to start.
Learning the Basic Technique
Four variables control almost everything about a stick weld's quality, and beginners generally struggle with the same ones:
- Arc length. Keep the arc roughly equal to the electrode's diameter. Too long, and the arc becomes unstable, throwing spatter and letting in atmospheric contamination that causes porosity. Too short, and the electrode tends to stick to the workpiece.
- Travel angle. A drag angle of about 15–20 degrees, tilting the top of the electrode in the direction of travel, is standard for most flat and horizontal welding.
- Travel speed. Move too fast and the weld won't penetrate or fill properly; move too slow and you'll pile up excess metal or burn through thin material.
- Amperage. Set too low, the rod sticks and penetration suffers. Set too high, you get excessive spatter, undercutting, and a puddle that's difficult to control.
A useful way to start is striking the arc like lighting a match: a quick, light scratch or tap motion rather than jabbing the rod straight down, which is the single most common reason beginners struggle to get an arc going in the first place. Once the arc is running, resist the urge to stare only at the puddle directly under the rod; watching the leading edge of the puddle helps you judge penetration and adjust speed before problems show up in the finished bead.
After each pass, let the weld cool enough to handle safely, then chip the slag off with a chipping hammer and clean the bead with a wire brush before running another pass. Skipping this step is one of the fastest ways to trap slag inclusions inside a multi-pass weld.
Welding in Different Positions
Stick welding is used in all four standard welding positions, and each one changes the technique:
- Flat. The easiest position and the one beginners should master first. Gravity helps pull the molten metal into the joint, which supports even penetration and bead shape.
- Horizontal. Gravity now pulls the puddle downward along a vertical face, which can cause sagging. Favoring the top edge of the joint slightly and using narrower stringer beads instead of wide weaves helps keep the bead from rolling.
- Vertical. Widely considered the hardest position for beginners to control, since gravity is working directly against the puddle. Lower amperage than the flat-position setting, a short arc length, and an electrode like E7018 (whose coating solidifies quickly) all help prevent the puddle from sagging or dripping.
- Overhead. Technically demanding and physically uncomfortable, since molten slag and spatter fall toward the welder. A short arc, a small, tightly controlled puddle, and full protective gear are non-negotiable here.
Most welding schools and certification programs sequence training in exactly this order, flat first, overhead last, because each position builds control skills the next one depends on.
Stick Welding vs. MIG, TIG, and Flux-Cored Welding
| Factor | Stick (SMAW) | MIG (GMAW) | TIG (GTAW) | Flux-Cored (FCAW) |
|---|---|---|---|---|
| Shielding | Flux-generated gas and slag | External shielding gas | External shielding gas | Flux-generated (self-shielded) or gas-assisted |
| Outdoor/wind tolerance | Excellent | Poor | Poor | Good |
| Works on dirty/rusty metal | Yes | Poor | No | Moderate |
| Learning curve | Moderate | Easiest | Steepest | Moderate |
| Cleanup required | Slag chipping every pass | Minimal | None | Slag chipping (self-shielded) |
| Typical use case | Structural, pipeline, field repair, farm work | Shop fabrication, thin-to-medium steel | Precision, thin material, exotic metals | Heavy fabrication, thick steel, outdoor work |
No process is universally "better." MIG is generally the fastest process to learn and produces the cleanest results with the least cleanup, which is why it's often recommended first for shop-based beginners. TIG offers the most control and the cleanest welds but demands the most hand-eye coordination. Stick welding trades some speed and bead cosmetics for ruggedness, low equipment cost, and the ability to weld outside or on imperfect material, which is exactly why it never disappeared from field work.
Common Beginner Mistakes and How to Fix Them
Almost every early stick welding problem traces back to one of these:
- Electrode sticking to the workpiece. Usually caused by amperage set too low or an arc length that's too short. Increase amperage slightly and strike the arc with a quick, light motion rather than jabbing straight down.
- Excessive spatter. Typically comes from an arc that's too long, amperage set too high, or a dirty work surface. Tighten the arc length and clean the base metal before welding.
- Undercutting, where a groove is melted along the edge of the joint that weakens it. Usually caused by too much current combined with too fast a travel speed. Slow down and let the puddle fill the edges before moving on.
- Porosity, small gas pockets trapped in the weld. Most often caused by welding over oil, rust, paint, mill scale, or moisture, or by an arc length that's too long and losing shielding coverage. Clean the joint thoroughly and keep electrodes stored dry.
- Poor penetration, where the weld sits on top of the joint instead of fusing into it. Usually the result of amperage set too low, travel speed too fast, or incorrect polarity for the electrode being used.
- Arc blow, where the arc visibly wanders away from the joint, especially near corners or on thick material. More common with DC current; switching to AC, when the electrode supports it, largely eliminates the effect.
The common thread through nearly all of these is preparation and settings, not raw manual skill. Clean metal, the right amperage for the rod diameter, and a consistent arc length solve the majority of beginner problems before technique even becomes the limiting factor.
Safety: What Beginners Underestimate
Stick welding is generally forgiving of technique mistakes, but it is not forgiving of skipped safety precautions, and the two categories of risk that catch beginners off guard are electrical/fire hazards and fume exposure.
Electrical and fire risk. Welding circuits can exceed 100 amps, and a poor ground connection, wet gloves, or damaged cable insulation turn a welder into a genuine shock hazard. Flying spatter and hot slag are also a fire risk around fuel, solvents, and combustible dust, which is why welding areas need to be cleared of flammable material and, where required, monitored with a fire watch. ANSI/AWS Z49.1, the primary U.S. consensus standard for welding and cutting safety, sets out requirements for protective equipment, fire prevention, and ventilation across all arc welding processes.[2]
Fume exposure. Welding fume is a mixture of metal oxide particulates and gases generated as the electrode and base metal vaporize in the arc. OSHA regulates it under a permissible exposure limit (PEL) of 5 mg/m³ as an 8-hour time-weighted average for general welding fume, with much stricter limits for specific hazardous constituents; manganese, present in nearly all steel and most stick electrodes, carries its own PEL because of documented neurological risk.[3] A peer-reviewed literature review in the International Journal of Hygiene and Environmental Health found that while high manganese exposure has long been linked to a Parkinsonian syndrome called manganism, lower-level chronic exposure has also been associated with subtler neurobehavioral effects, including changes in reaction time, mood, and hand-eye coordination, findings that continue to support conservative exposure controls even when acute symptoms aren't present.[4]
None of this means stick welding is uniquely dangerous compared to other arc processes; it means fume and ventilation deserve the same seriousness as eye protection, which many beginners underweight. Adequate ventilation, working outdoors or with local exhaust when welding indoors, and using a properly rated respirator when ventilation alone isn't enough are the primary controls, with PPE treated as the last line of defense rather than the whole plan.[5]
Minimum PPE for stick welding includes:
- An auto-darkening or fixed-shade welding helmet rated for the amperage in use
- Flame-resistant gloves rated for welding, not general work gloves
- Flame-resistant clothing with no cuffs, open pockets, or exposed skin at the wrists or collar
- Boots with no exposed mesh or laces that could trap sparks
- Hearing protection in enclosed or reverberant spaces
- Adequate ventilation or a properly selected respirator when working indoors or in confined spaces
Who Should Choose Stick Welding?
Stick welding is a strong fit if you'll be welding outdoors, working on rusty or painted steel you can't fully clean, need equipment that tolerates being dragged around a farm or job site, or want to start with the lowest possible equipment cost. It's also still the expected skill for many structural, pipeline, and shipyard welding jobs, so it remains a practical first process for anyone pursuing welding professionally.
It's a weaker fit if you're mainly working with thin sheet metal, want the fastest possible learning curve, or care most about a clean, spatter-free finish without post-weld grinding, in those cases, MIG welding is usually the better starting point. If your work is precision fabrication on thin or exotic metals like aluminum or stainless steel, TIG is the more appropriate skill to build first.
What It Costs to Get Started
Stick welding remains one of the least expensive ways into the trade. Basic AC-only transformer welders capable of handling common home-shop repairs can be found at a modest price point, while AC/DC inverter machines, which offer smoother arcs and more electrode flexibility, cost more but remain cheaper than comparable MIG setups once you account for the wire feeder and gas cylinder MIG requires. Ongoing costs are also low: electrodes are inexpensive, there's no shielding gas to refill, and the equipment itself, being simpler, tends to need less maintenance than wire-feed systems.
A Brief History
Arc welding traces back to the discovery of the sustained electric arc in the early 1800s, but shielded metal arc welding as a distinct process didn't take shape until the early 20th century. Bare metal electrodes existed before that, but they produced brittle, porous welds because nothing protected the molten metal from the surrounding air. The breakthrough came around 1900, when inventors including Oscar Kjellberg began coating electrodes in mineral compounds specifically to shield the arc, and the process was largely finalized by 1907. A later innovation, the extrusion process developed in the 1920s, made coated electrodes cheaper to mass-produce and allowed manufacturers to formulate coatings for specific jobs, which is ultimately what turned stick welding into the standardized, widely available process still taught today.[6]
The Bottom Line
Stick welding earns its long shelf life by being simple, rugged, and largely indifferent to bad weather and imperfect metal. It asks more of the welder in terms of technique and cleanup than MIG welding does, but it asks less of the wallet and the job site, no gas bottle, no wire liner, and a machine that will start in conditions that would shut down a gas-shielded process. Learn to read an electrode's AWS code, match amperage to rod diameter, keep your arc length consistent, and take fume and fire safety as seriously as eye protection, and you'll have a process that scales from a backyard gate repair to structural and pipeline work without ever needing a different machine.
Frequently asked questions
What does SMAW stand for, and is it the same as stick welding?
SMAW stands for shielded metal arc welding, and it's the technical name for what's commonly called stick welding. Both terms describe the same process: melting a flux-coated consumable electrode to join metal.
Is stick welding good for beginners?
Yes, with some caveats. It's mechanically simple and inexpensive to get started with, and it tolerates imperfect technique and dirty metal better than gas-shielded processes. However, most instructors consider MIG welding slightly easier to learn first because it doesn't require slag removal or the same level of arc-length control.
What amperage should I use for stick welding?
Amperage depends on electrode diameter, type, and welding position, but a common starting rule is roughly one amp per thousandth of an inch of electrode diameter. A 1/8-inch electrode typically runs somewhere in the range of 90–140 amps depending on the specific rod and the manufacturer's recommended settings printed on the box.
Do I need AC or DC to stick weld?
It depends on the electrode. Some rods, like E6011 and E6013, are formulated to run on either AC or DC. Others, like E7018 and E6010, are typically run on DC for the smoothest arc and best penetration, though some are AC-capable depending on the specific formulation. Checking the electrode's data sheet is the reliable way to confirm.
What's the best electrode for a beginner to start with?
E6013 is commonly recommended as a first electrode because of its smooth, easy-to-control arc and light penetration, which forgives imperfect arc length and travel speed. E7018 is a common next step once basic control is established, since it's the standard for most structural applications.
Why does stick welding leave slag, and do I have to remove it?
Slag is a byproduct of the flux coating that protects the cooling weld from atmospheric contamination. Yes, it needs to be chipped and wire-brushed off after each pass; leaving slag in place before running another pass over it risks trapping slag inclusions inside the joint, which weakens the weld.
Can stick welding be used outdoors in wind or rain?
Wind tolerance is one of stick welding's biggest advantages, since the flux generates its own shielding rather than relying on a gas that wind can blow away. Rain and wet conditions are a different issue entirely: welding on wet metal or with wet gloves introduces a serious electrical shock hazard and should be avoided regardless of the process.
How thick of metal can stick welding handle?
With the right electrode and amperage, stick welding comfortably handles material from about 1/16-inch sheet metal (with a small-diameter electrode and low amperage) up through several inches of structural steel in multi-pass welds. It's generally considered better suited to medium and thick material than to very thin sheet metal, where burn-through becomes a real risk.
Is stick welding dangerous compared to other welding processes?
The core risks, arc flash, electric shock, fume exposure, and fire, are broadly similar across arc welding processes when proper precautions are followed. Stick welding doesn't carry unique risks beyond those shared by MIG and flux-cored welding, but its flux coatings do contribute to fume composition, which is part of why ventilation and PPE remain essential regardless of which arc process you're using.
What's the difference between stick welding and flux-cored arc welding?
Both processes generate their own shielding from flux rather than relying entirely on an external gas cylinder, which is why both tolerate outdoor and dirty-metal conditions well. The key difference is the electrode format: stick welding uses individual rods that must be replaced every 12 to 18 inches of weld, while flux-cored welding feeds a continuous tubular wire from a spool, which increases deposition rate and reduces downtime between passes.
References
A5.1/A5.1M: Specification for Carbon Steel Electrodes for Shielded Metal Arc Welding - American Welding Society, 2025. Carbon steel electrodes used in shielded metal arc welding.
ANSI/AWS Z49.1: Safety in Welding, Cutting, and Allied Processes - American National Standards Institute and American Welding Society, 2021. Welding, cutting, and allied process safety requirements.
Occupational Safety and Health Administration, Controlling Hazardous Fume and Gases During Welding - U.S. Department of Labor, accessed 2026-07-15.
Flynn, Michael R. and Pam Susi, Neurological Risks Associated with Manganese Exposure from Welding Operations: A Literature Review - International Journal of Hygiene and Environmental Health, 2009. Literature review on neurological risks associated with manganese exposure during welding.
Occupational Safety and Health Administration, 1910.252 – General Requirements: Welding, Cutting, and Brazing - U.S. Department of Labor, accessed 2026-07-15.
Open Washington / Pressbooks, 8.1 History of SMAW - Introduction to Welding, accessed 2026-07-15.