
What Is MIG/MAG Welding?
Learn what MIG/MAG welding is, how it works, which gases and wires to use, and how to avoid the mistakes that trip up most beginners.

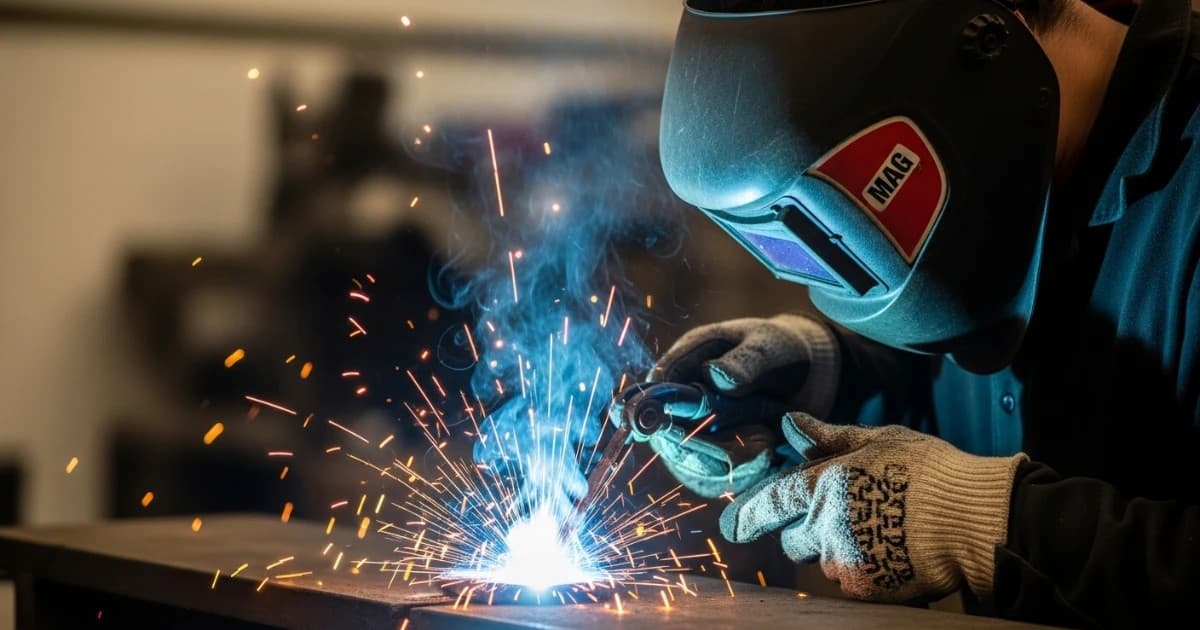
If you've ever watched someone weld two pieces of steel together with a hand-held gun feeding wire automatically, no tapping rods, no constant electrode changes, you were probably watching MIG/MAG welding. It's the process that put reliable, repeatable welds within reach of hobbyists, and it's still the backbone of production welding in shipyards, auto plants, and steel fabrication shops. MIG/MAG welding is a form of gas metal arc welding (GMAW) that uses a continuously fed wire electrode and a shielding gas to protect the weld pool, and understanding the difference between its two variants, and the countless small decisions around gas, wire, and settings, is the fastest way to go from a beginner burning through sheet metal to someone who can lay a clean, consistent bead on demand.
This guide walks through what MIG/MAG welding actually is, how the equipment works together, which gases and wires match which materials, and the mistakes that quietly ruin most first-timers' welds. It's written for someone standing in front of a welder for the first time, but experienced hobbyists switching from stick or flux-core will find the gas, transfer-mode, and troubleshooting sections useful too.
What MIG/MAG Welding Actually Is
MIG and MAG are both branches of the same underlying process: gas metal arc welding (GMAW). In GMAW, an electric arc forms between a continuously fed wire electrode and the workpiece. That arc melts the tip of the wire, which drops into the weld pool as filler metal, while a shielding gas flows out of the nozzle to protect the molten metal from atmospheric oxygen and nitrogen, the gases that cause porosity and weak welds if they get into the puddle.
The wire, the gas, and the arc all move together as you pull the trigger. There's no need to dip a filler rod (as in TIG) or replace a burning electrode every 12 inches (as in stick welding). That single design choice is why MIG/MAG welding became the default recommendation for people learning to weld: the wire feed does a lot of the coordination work for you.
MIG stands for Metal Inert Gas welding. It uses a chemically inert gas, typically pure argon or an argon-helium blend, that doesn't react with the molten metal at all. MAG stands for Metal Active Gas welding. It uses a gas mixture that includes an active component, usually carbon dioxide or oxygen, blended with argon. The "active" gas isn't inert; it takes part in the arc chemistry, which changes arc behavior, penetration, and bead appearance.[1]
In everyday hobbyist conversation, most people just say "MIG welding" regardless of which gas is loaded, and equipment manufacturers rarely bother separating the two terms for casual users. But the distinction matters once you're choosing shielding gas for a specific metal, because getting it backwards will cost you weld quality.
MIG vs. MAG: Where the Real Difference Lies
The processes are mechanically identical. The wire feed system, the gun, the power source, the arc physics, all the same. The only variable that separates MIG from MAG is the shielding gas, and that one variable changes several practical outcomes:
- Gas composition. MIG uses inert gases, pure argon or argon-helium mixes. MAG uses active-gas blends, most commonly argon with 15–25% CO₂, or in some cases pure CO₂.[3]
- Penetration. MAG's active gas increases arc energy and drives deeper penetration into the base metal. MIG's inert gas produces a cooler, more controlled arc with shallower penetration.
- Appearance and spatter. MIG welds with pure argon tend to look cleaner with less spatter. MAG welds, especially with higher CO₂ content, produce more spatter and a slightly rougher bead, though they're often stronger for structural joints.
- Materials. MIG (inert gas) is the standard for aluminum, magnesium, and other non-ferrous metals where an active gas would react with the metal or its oxide layer. MAG is the default for carbon and low-alloy steels, where the added penetration and lower gas cost matter more than a pristine bead surface.
If you're welding steel, you are almost certainly MAG welding, even if you call it MIG. If you're welding aluminum, you're doing true MIG welding with pure argon. Neither is "better"; they're matched to different jobs.
Why MIG/MAG Welding Matters
MIG/MAG welding earned its dominance in industry and its popularity with beginners for a handful of very practical reasons. It's fast: the continuous wire feed and lack of slag removal mean you spend more time welding and less time cleaning between passes. It's versatile: with the right wire and gas swap, the same machine handles carbon steel, stainless steel, and aluminum. And it produces no slag, unlike stick welding, so there's less post-weld grinding and a lower chance of trapping slag inclusions inside the joint.[1]
Those advantages explain why MIG/MAG is the primary joining method in shipbuilding, structural steel fabrication, pipeline work, pressure vessel manufacturing, and automotive assembly, and why it's the process most welding schools put in front of first-year students. Learning it well gives you a process that scales from garage repairs to industrial fabrication without switching machines.
How the Process Works, Step by Step
- Wire feed starts. Pulling the trigger starts the wire feeder, which pushes solid wire from a spool through a liner in the gun cable, typically at 100–800 inches per minute depending on settings.[6]
- The arc ignites. As the wire tip touches the workpiece and current flows, an arc forms between the wire and the base metal.
- Shielding gas flows. Gas flows out of the nozzle simultaneously, displacing air around the arc and weld pool.
- The wire melts into the puddle. The arc's heat melts the wire tip continuously, and depending on voltage and wire speed, metal transfers across the arc as small droplets (short-circuit transfer), larger globs (globular transfer), a fine spray (spray transfer), or precisely timed pulses (pulsed-spray transfer).
- The puddle solidifies. As you move the gun along the joint, the molten pool behind the arc cools and solidifies into the weld bead, still protected by trailing shielding gas until it's cool enough not to oxidize.
This entire sequence repeats dozens of times per second, which is why MIG/MAG feels almost automatic once you've got the settings dialed in, most of the fine control happens inside the machine, not in your hand.
Equipment You'll Actually Use
A MIG/MAG setup has fewer moving parts than it looks like at first glance:
- Power source with integrated wire feeder. Almost all hobbyist and portable professional machines combine these into one unit. It's a constant-voltage power supply, meaning the machine holds voltage steady while current adjusts to the arc length, which is what makes the process forgiving for beginners.
- MIG gun (torch). Houses the trigger, the contact tip (which transfers current into the wire), and the nozzle (which directs shielding gas around the arc).
- Shielding gas cylinder and regulator/flowmeter. Supplies gas at a controlled flow rate, typically 20–50 cubic feet per hour (CFH) depending on nozzle size, wind conditions, and material.[6]
- Ground (work) clamp. Completes the electrical circuit by attaching to the workpiece or welding table; a loose or corroded ground clamp is a surprisingly common cause of an unstable arc.
- Wire spool. Solid or flux-cored wire, matched to the base metal and shielding gas you're using.
Polarity: A Detail Beginners Often Skip
GMAW with solid wire and shielding gas runs almost exclusively on DCEP (direct current, electrode positive), meaning the gun cable connects to the positive terminal and the ground clamp to the negative. DCEP produces a stable arc, efficient wire melting, and deep penetration.[6] Self-shielded flux-core wire is the exception: it typically runs DCEN (electrode negative), which is why swapping between gas-shielded solid wire and self-shielded flux-core often means reversing your machine's polarity leads, not just swapping spools. Check your wire manufacturer's spec sheet before you weld; running the wrong polarity produces a weak, spattery mess that looks like a machine problem but isn't.
Shielding Gas: Matching Gas to Metal
Shielding gas selection has more effect on weld quality than almost any other single variable, and it's the one beginners are most likely to get wrong by simply using whatever gas was already on the machine.
| Gas / Mixture | Best For | Notes |
|---|---|---|
| 100% Argon | Aluminum, magnesium, other non-ferrous metals | True MIG; stable arc, low spatter, minimal penetration on steel |
| 75% Argon / 25% CO₂ (C25) | General-purpose mild steel | Most common MAG mix; good balance of penetration and appearance |
| 90/10 or 85/15 Ar/CO₂ | Thinner mild steel, cosmetic welds | Less spatter than C25, slightly less penetration |
| 100% CO₂ | Thick structural steel, heavy fabrication | Cheapest option; deep penetration but more spatter and rougher bead[4] |
| Argon + 1–2% O₂ | Stainless steel | Stabilizes arc and puddle fluidity without harming corrosion resistance |
| Tri-mix (Ar/He/CO₂) | Thicker stainless sections | Adds heat input via helium for better fusion |
A rule of thumb worth remembering: pure argon for aluminum, an argon/CO₂ blend for steel, and a low-CO₂ argon/oxygen mix for stainless. Get this wrong, weld aluminum with an active gas, for instance, and you'll fight porosity and a dirty, sooty bead no matter how good your technique is.
Flux-cored wire is the workaround when gas isn't practical. Self-shielded flux-core wire generates its own shielding gas from flux inside the wire as it burns, which makes it the better choice for outdoor welding, windy job sites, or dirty and rusty material where an external gas shield would blow away or wouldn't help much anyway.
Wire Types: What's Actually in the Spool
Wire selection is matched to base metal, not personal preference:
- ER70S-6 is the default solid mild-steel wire. The "70" indicates a minimum tensile strength of 70,000 psi, and the added silicon and manganese deoxidizers give it tolerance for light mill scale and minor surface contamination, which is why it's forgiving for beginners working with less-than-pristine steel.[6]
- ER4043 is the most common aluminum filler wire, a 5% silicon alloy chosen for its forgiving flow characteristics and clean bead over pure aluminum wire, suited to alloys like 3003, 5052, and 6061.
- Flux-cored wire (E71T-11, E71T-1, etc.) either self-shields (no external gas needed) or works with gas depending on the specific classification. It's the practical choice for outdoor work, thicker material, or dirty steel.
- Stainless steel wires (ER308L, ER309L, ER316L) are matched to specific stainless alloys and are used with low-CO₂ argon blends to preserve corrosion resistance.
Wire diameter matters as much as alloy. Thinner wire (0.023–0.030") suits sheet metal and thin-gauge work; thicker wire (0.035–0.045") suits structural steel and heavier plate, mostly because it can carry more current without overheating inside the liner.
Dialing In Your Settings
Every MIG/MAG welder balances two settings against each other: voltage (arc length and heat) and wire feed speed (deposition rate, which also affects amperage). Get one wrong and the other can't fully compensate.
As a rough starting reference for mild steel with 0.030" ER70S-6 wire and C25 gas:
| Material Thickness | Voltage | Wire Feed Speed |
|---|---|---|
| Thin sheet (1–2 mm / 18–24 ga) | 15–17V | 90–150 IPM |
| Medium (3–4 mm / 1/8") | 18–19V | 220–300 IPM |
| Thick (6 mm / 1/4") | 19–21V | 280–350 IPM |
These numbers vary by wire brand, machine, and gas mix, so treat them as a starting point, not gospel. A commonly cited shortcut for amperage is the "1-amp rule": each 0.001 inch of steel thickness roughly needs 1 amp of output, so 1/8" (0.125") steel needs around 125 amps.[10] Your welder's built-in settings chart, usually printed inside the side panel, will be more accurate for your specific machine than any general chart, because it accounts for that manufacturer's wire drive and duty cycle characteristics.
Signs your settings are off:
- Loud, harsh crackling and heavy spatter usually means voltage or wire speed is too high.
- A popping, stubbing arc where the wire seems to push into the puddle without melting cleanly usually means voltage is too low relative to wire speed.
- A narrow, ropy bead sitting on top of the metal without fusing in usually means not enough heat overall.
Understanding Transfer Modes
The way molten metal actually crosses the arc, called the transfer mode, is determined by your voltage, wire speed, and gas choice, and it changes what the process is good for:
- Short-circuit transfer happens when the wire tip touches the puddle and shorts out 90 to 200 times per second, transferring small amounts of metal each cycle.[5] It produces a small, fast-freezing puddle, which makes it the go-to mode for thin sheet metal, root passes with gaps, and welding in any position, including vertical and overhead.
- Globular transfer sends metal across in large, gravity-driven droplets, generally with 100% CO₂ shielding. It's usable on flat and horizontal joints but hard to control out of position because the droplets are too large and unpredictable.
- Spray transfer atomizes the wire into a fine, continuous stream of droplets at higher voltage, giving a clean weld with minimal spatter. It needs argon-rich gas and more heat, which limits it to flat and horizontal work on thicker material, too much heat for thin sheet or out-of-position welding.
- Pulsed-spray transfer alternates between a high peak current and a low background current, achieving spray-like quality at a lower average heat input. It needs a more advanced power supply with waveform control, but it opens up spray-quality welds in more positions and on thinner material than standard spray transfer allows.[5]
For most beginners on a basic machine, short-circuit transfer is what you'll be using by default, and it's genuinely the right choice for learning: forgiving, low heat, and works in every position.
MIG/MAG vs. TIG vs. Stick Welding
Beginners often ask which process to learn first. Each has a different balance of speed, control, and forgiveness:
| Factor | MIG/MAG | TIG | Stick |
|---|---|---|---|
| Learning curve | Easiest; usable beads within an hour | Hardest; 40–80 hours before consistently sound welds | Moderate |
| Speed | Fast, continuous wire feed | Slow, two-handed control | Moderate |
| Cleanup | Minimal, no slag | Minimal | Heavy, slag must be chipped |
| Portability / outdoor use | Needs gas shielding (wind-sensitive) unless using flux-core | Needs gas shielding, very wind-sensitive | Works outdoors, on rusty or dirty metal |
| Typical use case | Auto body, fabrication, general shop work | Aerospace, pipe, precision and thin material | Field repair, heavy equipment, construction |
MIG/MAG is the practical starting point for most beginners because the continuous wire feed removes one whole layer of coordination that stick and TIG require you to manage manually. TIG rewards patience and precision but has a genuinely steep learning curve. Stick is more tolerant of dirty, rusty material and windy outdoor conditions, which makes it common in construction and field repair despite being harder to learn cleanly than MIG.
Common Mistakes Beginners Make
Most early MIG/MAG problems trace back to a handful of repeatable habits, not bad luck:
- Wrong wire speed or voltage. Too much wire speed causes excess spatter and an uneven bead; too little causes weak penetration and a cold, unfused joint.
- Skipping surface prep. Welding over mill scale, paint, oil, or rust leads to porosity and poor fusion no matter how good your settings are. Grind or wire-brush the joint first.
- Poor gun angle. A drag angle of roughly 15–20°, gun tilted back toward the completed weld, keeps the arc stable and the gas coverage consistent. Too steep or too flat causes irregular beads and gas turbulence.
- Wrong contact-tip-to-work distance (stickout). Keep it around ⅜–⅝ inch (10–15 mm). Too far and the arc weakens and heat drops; too close and the wire sticks or burns back into the tip.
- Inconsistent travel speed. Moving too fast leaves a thin, weak bead; moving too slowly piles up excess metal and can burn through thin material.
- Jumping to out-of-position welding too soon. Flat position is genuinely the easiest to learn. Vertical and overhead introduce gravity working against the puddle, and beginners who skip flat-position practice tend to develop bad habits that are harder to unlearn later.
Troubleshooting: Porosity, Spatter, and Weak Welds
Porosity (small pinholes or voids in the bead) is almost always caused by shielding gas failing to protect the puddle: insufficient gas flow, a clogged or spatter-filled nozzle, drafts blowing the gas away, contaminated base metal, or wire stickout extending too far past the nozzle.[8] The fix is usually mechanical: check gas flow rate, clean or replace the nozzle, shield the work area from wind, and clean the joint before welding.
Excess spatter usually comes from the same root causes as porosity, plus voltage or wire speed set too high for the material. Dialing back either setting, and confirming gas coverage is solid, resolves most spatter problems.
Weak or cold welds that look fine on the surface but lack real fusion typically mean not enough heat input, either voltage too low, travel speed too fast, or wire feed speed mismatched to voltage. If you can chip a bead off with light force, it never truly fused to the base metal.
Welding Different Materials: What Changes
Mild steel is the most forgiving material for MIG/MAG and the right place to start. ER70S-6 wire with C25 gas covers the overwhelming majority of hobbyist and light fabrication work.
Stainless steel requires tighter gas control. A shielding gas with less than 5% CO₂ is essential, more than that and the weld loses corrosion resistance because carbon migrates into the metal.[4] A push (forehand) technique with a 10–15° gun angle and a consistent arc length around 10–12 mm gives the smoothest bead and best gas coverage.
Aluminum is the most technically demanding of the three for MIG/MAG beginners. It conducts heat away from the weld extremely fast, which invites burn-through, and it's coated in an oxide layer that melts at a much higher temperature than the aluminum underneath, so the arc has to punch through that oxide before it can properly fuse the base metal. Pure argon is required, and a spool gun or push-pull feed system is strongly recommended, since aluminum wire is soft enough to buckle or "birdnest" in a standard feeder pushing wire through a long cable. Expect a longer learning curve on aluminum than on steel, even if you're already comfortable MIG welding mild steel.
Safety: What You Can't Skip
MIG/MAG welding produces UV radiation, spatter, intense heat, and fume that contains metal oxides, iron oxide and manganese most commonly on mild steel, plus chromium, nickel, and other metals depending on the base material and wire.[7] Long-term overexposure to welding fume is linked to respiratory disease and, with certain metals, to more serious neurological effects.
Non-negotiable basics:
- Auto-darkening welding helmet rated for the amperage you're using, plus safety glasses underneath.
- Flame-resistant gloves, jacket or sleeves, and closed-toe boots. Cotton or leather, never synthetic fabrics that can melt onto skin.
- Ventilation. OSHA's control hierarchy puts engineering controls, local exhaust ventilation that captures fume at the source, ahead of personal protective equipment.[7] A fan blowing fume toward you is not ventilation; it needs to pull fume away from your breathing zone.
- Respiratory protection when ventilation alone can't keep fume below safe limits, particularly in confined spaces or on galvanized, stainless, or coated metals.
- Fire safety. Clear the area of flammable material, keep a fire extinguisher nearby, and be aware that sparks travel farther than they look like they will.
If you're welding indoors in a garage or small shop without dedicated extraction, at minimum crack a door or window and position a fan to pull, not blow, fume away from your face.
Buying Your First MIG/MAG Welder
Entry-level MIG welders capable of handling sheet metal up to roughly 1/4" mild steel in a single pass generally start around $400 for reputable brands, with well-known budget options available for less. Beyond the machine itself, budget for a helmet and PPE (roughly $150–300), consumables like wire, tips, and nozzles ($50–100), and basic accessories like clamps and a wire brush ($75–150).
A few practical buying considerations:
- Input voltage. 120V machines are more common in home garages but limited in output; 220V/240V machines weld thicker material and run at a lower duty cycle strain for the same job.
- Duty cycle. Listed as a percentage at a given amperage (e.g., "20% at 140A"), it tells you how many minutes out of 10 the machine can run continuously before needing to cool. Higher duty cycle matters more for production work than for occasional hobby projects.
- Gas-ready vs. flux-core-only. Confirm the machine has a gas solenoid and regulator input if you plan to weld with shielding gas rather than flux-core wire exclusively.
- Brand support and parts availability. Established brands cost more upfront but typically have wider consumable availability, which matters once you're replacing tips and nozzles regularly.
Who Should Choose MIG/MAG, and When It's the Wrong Fit
MIG/MAG is the right starting point if you want to learn to weld quickly, work mostly indoors or in a controlled shop environment, and need a process that handles steel, stainless, and aluminum without buying three different machines.
It's a weaker fit if you routinely weld outdoors in wind (gas shielding blows away easily, though flux-core sidesteps this), if the metal you're working with is consistently rusty or painted and hard to clean before every pass (stick welding tolerates this better), or if you need the finest possible control on thin, precision, or highly visible welds (TIG usually wins there).
Conclusion
MIG/MAG welding earned its place as the default recommendation for new welders for good reason: the continuous wire feed and shielding gas system remove much of the manual coordination that makes other processes hard to learn, without sacrificing the versatility to weld steel, stainless, or aluminum with the same base machine. The real skill isn't in the trigger pull, it's in matching gas to metal, keeping your settings and stickout consistent, and building the discipline to clean your joint before every pass. Start on mild steel in the flat position with C25 gas and short-circuit transfer, get genuinely comfortable there, and the jump to stainless, aluminum, or out-of-position welding will be a lot less intimidating than it looks from where you're standing now.
Frequently asked questions
What's the actual difference between MIG and MAG welding?
The processes are mechanically identical, same wire feed, same arc, same equipment. The only difference is shielding gas: MIG uses an inert gas like pure argon, while MAG uses an active gas blend, typically argon mixed with CO₂ or oxygen. MIG is standard for aluminum and other non-ferrous metals; MAG is standard for steel.
Do I need shielding gas, or can I skip it?
Solid wire requires external shielding gas to protect the weld pool from air. If gas isn't practical, outdoor work, windy conditions, no cylinder available, you can switch to self-shielded flux-core wire, which generates its own protective shield from flux inside the wire as it burns.
What shielding gas should I use for mild steel?
A 75% argon / 25% CO₂ blend, often labeled C25, is the standard general-purpose choice. It balances penetration with a clean bead and manageable spatter. Pure CO₂ is cheaper and penetrates deeper but produces more spatter and a rougher finish.
Can I MIG weld aluminum with the same gas as steel?
No. Aluminum requires 100% pure argon. Using an active gas mixture meant for steel will cause porosity, a dirty bead, and poor fusion because the active gas reacts with the aluminum and its oxide layer.
What is "stickout" and why does it matter?
Stickout, or contact-tip-to-work distance, is the length of wire extending beyond the contact tip before it reaches the arc. A typical distance is 3/8 to 5/8 inch. Too long weakens the arc and reduces gas coverage; too short risks the wire sticking to the tip or burning back into it.
Why does my weld have small holes or pinholes in it (porosity)?
Porosity almost always comes down to shielding gas failing to protect the puddle. Common causes include:
- Insufficient gas flow rate or a leaking hose
- A clogged or spatter-filled nozzle
- Drafts or wind blowing the gas shield away
- Contaminated base metal (rust, paint, oil, mill scale)
- Wire stickout extending too far past the nozzle
Check gas flow first, then clean the nozzle and the joint before welding again.
Is MIG/MAG welding harder than stick or TIG welding?
It's generally considered the easiest of the three to learn. Most beginners can lay an acceptable bead within their first hour of practice, though consistent, structurally sound results still take weeks of regular practice. TIG has the steepest learning curve; stick sits in between.
What polarity should my MIG welder be set to?
Standard gas-shielded solid wire runs on DCEP (direct current, electrode positive), gun cable to positive, ground clamp to negative. Self-shielded flux-core wire often runs the opposite polarity, DCEN, so check your specific wire's spec sheet before welding, since running the wrong polarity produces a weak, spattery weld.
What wire size should a beginner start with?
For general mild-steel hobby work, 0.030" ER70S-6 is a common, versatile starting point, thin enough for sheet metal, capable enough for medium-thickness plate with the right settings. Thicker wire (0.035–0.045") suits heavier structural material better.
Can MIG/MAG welding be done outdoors?
Gas-shielded MIG/MAG struggles outdoors because wind disperses the shielding gas and lets air contaminate the weld, causing porosity. Self-shielded flux-core wire, which doesn't rely on external gas, is the better choice for outdoor or windy conditions.
What safety gear is essential for MIG/MAG welding?
At minimum: an auto-darkening welding helmet with the correct shade, safety glasses, flame-resistant gloves and clothing, closed-toe boots, and adequate ventilation. Fume extraction should come before relying on a respirator alone, and OSHA specifically prioritizes engineering controls like local exhaust ventilation over personal protective equipment.
How much does it cost to start MIG/MAG welding as a hobbyist?
A capable entry-level machine from a reputable brand typically starts around $400. Add roughly $150–300 for PPE, $50–100 for consumables like wire and tips, and $75–150 for basic accessories such as clamps and a wire brush.