
Stick Welding Troubleshooting: Common Defects Explained
A practical troubleshooting guide to common stick welding defects — what causes porosity, undercut, cracking, and more, and how to fix each one.

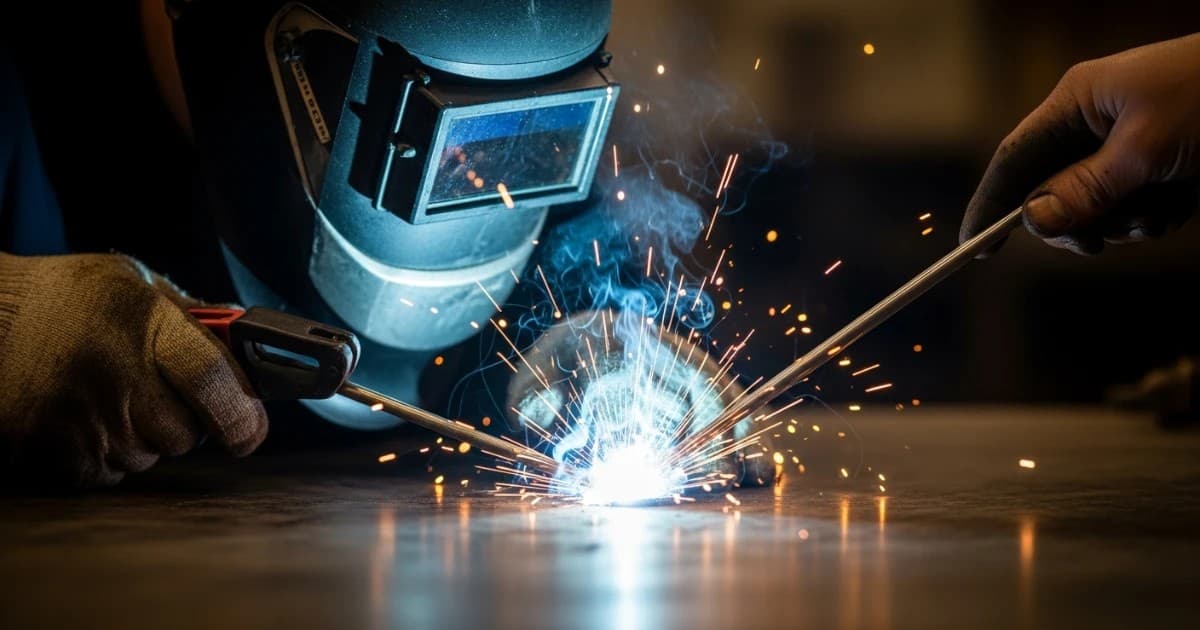
Every stick welder eventually stares at a bead that looks wrong and has to figure out why. Maybe it's a string of pinholes down the center, a bite line eaten into the base metal, or a crack that opens up right as the slag chips away. This kind of stick welding troubleshooting is less about memorizing rules and more about learning to read what the arc and the puddle are telling you.
Shielded metal arc welding (SMAW) rewards good fundamentals and punishes shortcuts fast. A rod pulled from a damp truck box, an amperage setting borrowed from the wrong chart, or a ground clamp bolted to a rusty table can all show up as a defect in the finished bead. The good news is that most SMAW problems trace back to a small set of variables — current, arc length, angle, travel speed, electrode condition, and joint fit-up — which makes them genuinely diagnosable once you know what to look for.
This guide walks through the defects welders run into most often, what actually causes each one, and how to correct it before it becomes a rework job or, worse, a structural liability.
Why Weld Defects Happen in the First Place
Almost every stick welding defect comes from an imbalance between heat input, travel speed, and shielding. The electrode coating burns to form a gas shield and a slag layer that protect the molten puddle from atmospheric contamination; anything that disrupts that balance — current that's too hot or too cold, an arc held too long or too short, a joint that's dirty or poorly fitted — tends to produce a specific, recognizable flaw.
It helps to think of five variables you're always adjusting, consciously or not:
- Amperage relative to electrode diameter and position
- Arc length, which controls voltage and shielding gas coverage
- Electrode angle, both travel angle and work angle
- Travel speed, which determines heat input per inch of weld
- Joint condition, including cleanliness, fit-up, and root gap
Most defects are the visible symptom of one of these being out of range. A quick diagnostic habit — check current first, then arc length, then angle, then speed, then the joint itself — will resolve the majority of problems without guesswork.
Safety note: Welding fumes contain metal oxides, including manganese, and prolonged exposure has been linked to neurological effects. Use local exhaust ventilation or a fume extractor whenever possible, keep your head out of the fume plume, and never weld in a confined space without forced ventilation.
Porosity: Pinholes and Trapped Gas
Porosity shows up as small round holes or pockmarks in the weld face, or as trapped bubbles you find during a bend test or grinding pass. It happens when gas gets trapped in the puddle as it solidifies, before it has a chance to escape to the surface.
Common causes:
- Moisture, rust, mill scale, paint, or oil on the base metal
- Electrode coating that has absorbed moisture from humid air or wet storage
- Arc length that's too long, which lets atmospheric nitrogen and oxygen into the shielding envelope
- Travel speed that's too fast, outrunning the gas shield before the puddle freezes
- Contaminated or damaged electrode coating (chipped, cracked, or gouged rods)
How to fix it:
- Grind or wire-brush the joint back to bright metal before striking an arc.
- Keep the arc length close to the diameter of the electrode's core wire — a long, buzzy arc is almost always too long.
- Store electrodes in a sealed container or rod oven, especially low-hydrogen types like E7018, and discard rods with visibly damaged coating.
- Slow down slightly if you notice a string of pinholes rather than isolated pits — that pattern usually points to travel speed outrunning shielding coverage rather than contamination.
Isolated surface porosity at the very start of a bead is common and usually just means the arc hadn't stabilized yet; porosity that persists through the whole pass is a process problem, not a one-off.
Undercut: The Bite Line Along the Toe
Undercut is a groove melted into the base metal at the edge of the weld (the toe) that doesn't get filled back in with weld metal. It reduces the effective thickness of the base metal right where stress concentrates, which is why inspection codes treat it seriously — structural codes such as AWS D1.1 typically cap undercut depth at a fraction of a millimeter on primary tension members.
Common causes:
- Amperage set too high for the position, joint, or electrode size
- Travel speed too fast, so the puddle can't flow back into the melted edge
- Poor weave technique — no dwell or pause at the edges of the joint
- Incorrect electrode angle directing too much arc force at one sidewall
How to fix it:
- Drop the amperage back into the middle of the electrode manufacturer's recommended range rather than running at the top of it.
- When weaving, pause briefly at each toe before moving back across the joint — this is the single most effective habit for eliminating undercut.
- Reduce travel speed slightly and keep the arc angle balanced between both plates in a fillet joint rather than favoring one side.
- On vertical-up welds, use a slight whip-and-pause motion instead of a continuous fast weave.
Light undercut on a non-critical cosmetic weld may be acceptable; on a structural or pressure-boundary joint, it typically needs to be blended out with a grinder and re-welded.
Incomplete Fusion and Incomplete (Lack of) Penetration
These two get confused constantly, and the distinction matters for how you fix them.
- Incomplete fusion means the weld metal didn't properly bond to the base metal or to a previous pass — there's a mechanical layer of material sitting on top rather than a true metallurgical joint.
- Incomplete penetration (lack of penetration) specifically means the weld didn't reach the root of the joint, leaving unfused base metal at the bottom of the groove.
Both are dangerous because they're often invisible from the surface — the weld can look clean on top while hiding a plane of weakness underneath.
Common causes:
- Amperage too low to melt the joint edges or previous bead fully
- Travel speed too fast, not allowing enough dwell time for the arc to penetrate
- Wrong electrode angle, directing heat away from the root or sidewall
- Root gap too tight or too wide for the electrode diameter being used
- Contaminated or scaled surfaces preventing proper wetting
How to fix it:
- Match amperage to material thickness and joint type — err toward the higher end of the range for root passes rather than the low end.
- Slow down enough to let the arc force dig into the root; a fast, cold pass almost never penetrates fully.
- Use a smaller-diameter electrode for tight root openings, then step up in diameter for fill passes.
- Grind a proper root face and gap during fit-up rather than trying to compensate with technique alone.
If a bend test or radiograph reveals lack of fusion on a structural weld, the repair is to gouge or grind the defect out completely and re-weld — grinding the surface smooth without removing the underlying flaw does not fix it.
Slag Inclusions
Slag inclusions are trapped bits of the protective slag layer left inside the weld metal, usually visible as dark, glassy specks once ground or as irregular lines on a radiograph.
Common causes:
- Slag from a previous pass not fully removed before running the next bead
- Slag getting ahead of the puddle and trapped underneath it — often from too slow a travel speed or an arc length that lets the puddle lag behind
- Multi-pass welds in tight grooves where slag can hide in undercut or overlap from the pass below
- Wrong electrode angle pushing slag forward instead of letting it trail behind the puddle
How to fix it:
- Chip and wire-brush every pass completely before starting the next one — don't just knock off the loose cap.
- Keep a consistent travel angle so the arc stays ahead of the slag rather than letting slag flow into the puddle.
- Clean out any undercut or overlap from a previous pass before covering it with the next bead; those pockets are the most common place slag hides.
- On root passes especially, grind between passes if visual inspection shows any trapped slag lines.
Spatter, Overlap, and Cosmetic Defects
Not every defect threatens structural integrity, but cosmetic and near-surface issues are still worth correcting because they often signal a setting that's out of range elsewhere.
Spatter — small droplets of molten metal scattered around the weld — usually comes from excessive amperage, too long an arc, or a damp electrode popping as it burns. Dialing amperage back into range and keeping a tight, consistent arc length reduces it substantially; anti-spatter compound on adjacent surfaces makes cleanup easier but doesn't fix the underlying cause.
Overlap happens when weld metal flows out over the base metal surface without actually fusing to it — the opposite problem from undercut. It's typically caused by:
- Amperage too low, so the puddle piles up instead of penetrating
- Travel speed too slow, letting excess filler accumulate
- Poor electrode angle that pushes metal ahead of the arc rather than into the joint
The fix is usually the reverse of the undercut fix: increase amperage slightly, pick up travel speed, and keep the arc angle aimed into the joint rather than skating along the surface.
Burn-Through
Burn-through is a hole melted completely through the base metal — common on thin sheet, on tight root gaps, or when amperage is set for thicker material than what's actually being welded.
How to fix it:
- Reduce amperage and increase travel speed on thin material; stick welding is often not the ideal process for anything much thinner than about 16-gauge without careful technique.
- Tighten an oversized root gap during fit-up rather than trying to bridge it with a hotter, slower pass.
- Use a backing bar or backing strip on open-root joints where burn-through risk is high.
- For an existing burn-through, grind the hole to clean metal, reduce heat input, and rebuild the joint in smaller, controlled passes rather than trying to fill the gap in one shot.
Cracking: Hot Cracks, Crater Cracks, and Hydrogen-Induced Cracks
Cracking is the defect that deserves the most respect, because it can propagate under load long after the weld looks finished. Stick welders typically encounter three flavors.
Crater and Hot Cracks
These form as the weld puddle solidifies, usually at the very end of a bead where the crater cools and shrinks fastest. Stopping abruptly leaves a small depression that concentrates shrinkage stress into a crack.
Fix: Before breaking the arc, pause, back-step slightly, or use a taper/crater-fill technique to fill the crater rather than pulling away on a hot, thin pool.
Cold (Hydrogen-Induced) Cracking
This is the more insidious problem, particularly with higher-strength steels. Hydrogen from moisture in the electrode coating, on the base metal, or in the atmosphere diffuses into the weld and heat-affected zone. Combined with residual stress and a hard, brittle microstructure from rapid cooling, it can cause cracks — sometimes called under-bead cracking — that appear hours or even days after welding.
Why low-hydrogen electrodes matter: Rods like E7018, E7016, and other "low-hydrogen" classifications are formulated to minimize diffusible hydrogen, but only if kept dry. A low-hydrogen rod left out of its packaging in humid air absorbs moisture quickly, which defeats the purpose of using it in the first place.
Prevention:
- Store low-hydrogen electrodes in a rod oven or sealed, dry container, and limit how long they sit exposed to open air once removed.
- Redry electrodes that have been exposed too long, following the temperature guidance on the electrode packaging — never redry electrodes rated for other coating types the same way, since excessive heat can damage them.
- Preheat thicker sections or higher-carbon steels to slow the cooling rate and let hydrogen diffuse out before it can concentrate.
- On critical joints in higher-strength steel, allow a delay before inspection, since hydrogen cracks can develop after the weld has cooled to room temperature.
Cold cracking is one of the few SMAW defects that can appear invisible at the time of welding and only surface later. On structural, pressure, or safety-critical work, this is the reason electrode storage discipline matters as much as welding technique.
Arc Blow
Arc blow is the arc visibly wandering, wavering, or deflecting to one side instead of running straight, and it's almost exclusively a DC welding problem. It's caused by magnetic fields — from the welding current itself or from residual magnetism in the base metal — pulling the arc off its intended path.
Common causes:
- Welding near the end of a joint, a corner, or a tack weld, where current flow becomes asymmetric
- Ground clamp placement that creates an unbalanced current path through the part
- Residual magnetism in the base metal, common on parts that have been near magnetic chucks or lifting magnets
- Welding inside a magnetic field created by nearby current-carrying cables
How to fix it:
- Move the ground clamp to a different location on the workpiece, or split the ground connection between two points to balance the current path.
- Shorten the arc length — a shorter arc gives the magnetic field less distance to deflect it before it reaches the puddle.
- Angle the electrode into the direction of the blow to counteract the deflection.
- Switch to AC where the process allows it; because AC reverses direction every half-cycle, it tends to cancel out much of the deflection that plagues DC.
- If residual magnetism is the culprit, demagnetize the part before welding.
Distortion and Warping
Distortion isn't a discontinuity inside the weld metal, but it's one of the most common reasons a finished weldment fails to meet dimensional tolerance. It happens because the weld metal and surrounding heat-affected zone expand when heated and then contract as they cool, and that contraction is resisted by the cooler surrounding base metal — leaving locked-in residual stress that pulls the part out of shape.
Practical ways to control it:
- Use the smallest weld size the joint actually requires — oversized fillets add heat input without adding strength.
- Balance welds on both sides of a joint or centerline where possible so shrinkage forces cancel out instead of pulling in one direction.
- Sequence welds instead of running one long continuous pass — skip welding and back-step techniques spread heat input out and let sections cool between passes.
- Use fixturing or clamping to hold critical dimensions, understanding this increases residual stress even as it controls final shape.
- On thin material, reduce amperage and increase travel speed rather than relying on a single hot pass.
Quick Diagnostic Table
| Symptom | Most likely cause | First thing to check |
|---|---|---|
| Pinholes or pitted surface | Trapped gas / contamination | Base metal cleanliness, arc length, electrode dryness |
| Groove along the weld toe | Heat or speed too high | Amperage, travel speed, weave dwell time |
| Weld looks fine but fails a bend test | Fusion didn't occur | Amperage, travel speed, electrode angle, joint fit-up |
| Dark glassy inclusions when ground | Trapped slag | Interpass cleaning, travel angle |
| Metal piled on the surface, not fused | Heat or speed too low | Amperage, travel speed |
| Hole through thin material | Excess heat for thickness | Amperage, root gap, backing |
| Crack at the end of a bead | Shrinkage at crater | Crater-fill / back-step technique |
| Crack appearing after cooling | Hydrogen / brittle microstructure | Electrode storage, preheat, base metal carbon content |
| Arc visibly wandering | Magnetic deflection (DC) | Ground clamp location, arc length, AC vs. DC |
| Part pulled out of tolerance | Uneven shrinkage | Weld sequence, fixturing, weld size |
The Most Overlooked Detail: Electrode Condition
Welders troubleshoot amperage, angle, and speed constantly, but the electrode itself is the variable most often ignored. A rod that's been rattling around in a toolbox, sitting in a damp garage, or stored with the lid off a container is already compromised before the arc is struck. This is the quiet cause behind a surprising share of porosity and cracking complaints that never get traced back to their actual source.
Treat electrodes as a consumable with a shelf life once exposed to air, not as a shelf-stable commodity. A rod oven is not overkill for a hobby welder running low-hydrogen electrodes — it's a cheap way to eliminate an entire category of defects before they happen.
Grind Out and Reweld, or Leave It?
Not every imperfection needs to be cut out. The honest answer depends on what the weld is for:
- Cosmetic or non-structural welds — light spatter, minor surface porosity, or slight overlap on a hobby project can often be ground and blended without full removal.
- Structural, pressure, or safety-critical welds — undercut beyond code limits, any lack of fusion, cracking of any kind, or porosity exceeding the applicable acceptance criteria should be gouged or ground out completely and re-welded, not just surfaced over.
- When in doubt on a code-governed job, refer to the specific standard that applies — AWS D1.1 for structural steel, ASME Section IX for pressure piping and vessels, or the relevant local code — rather than a general rule of thumb.
Grinding the surface smooth without removing the actual discontinuity is one of the most common — and most dangerous — shortcuts in field welding. Surface finish and joint integrity are not the same thing.
Bringing It Together
Most stick welding defects are not mysterious once you separate them into what they actually indicate: too much or too little heat, an arc that's too long or too short, an electrode that's wet or damaged, or a joint that wasn't properly prepared. Working through amperage, arc length, angle, travel speed, and joint condition in that order will resolve the large majority of problems without trial and error.
The habits that prevent defects are the same ones that make troubleshooting fast when something does go wrong: clean base metal, dry electrodes stored properly, amperage matched to the joint, and a deliberate technique instead of a rushed one. When a defect does show up, resist the urge to just grind the surface pretty — trace it back to the variable that caused it, fix that variable, and the next bead will tell you whether the diagnosis was right.
Frequently asked questions
What's the single most common stick welding defect for beginners?
Porosity and undercut are the two beginners run into most. Porosity usually traces back to a dirty joint or damp electrodes, while undercut typically comes from running too hot or moving too fast, especially while weaving.
Why does my stick weld have small holes in it?
Small holes are porosity, caused by gas getting trapped in the puddle before it solidifies. Check base metal cleanliness first, then arc length and electrode condition — moisture in the coating and rust or mill scale on the metal are the two most frequent culprits.
How do I stop undercut when weaving a stick weld?
Pause briefly at each edge of the weave before moving back across the joint, reduce amperage slightly, and slow your travel speed. The pause gives the puddle time to flow back into the melted edge instead of leaving it open.
What's the difference between lack of fusion and lack of penetration?
Lack of fusion means the weld metal didn't properly bond to the base metal or a previous pass anywhere along the joint. Lack of penetration specifically refers to the weld failing to reach the root of the joint. Both are usually caused by insufficient heat or travel speed that's too fast.
Why did my 7018 weld crack after I chipped the slag off?
This is often cold, or hydrogen-induced, cracking. It's linked to moisture in the electrode coating combined with a hard, brittle microstructure and residual stress. Check whether the rods were stored dry, consider preheating thicker or higher-carbon sections, and inspect again after the weld has fully cooled, since hydrogen cracks can appear later.
Do I really need a rod oven for stick welding?
For low-hydrogen electrodes like E7018 on anything structural or thicker than light-gauge material, yes — a rod oven is inexpensive insurance against moisture-related porosity and cracking. For general-purpose rods like E6011 on non-critical work, it matters less, though keeping any electrode dry is still good practice.
What causes arc blow, and how do I stop it?
Arc blow is the arc deflecting due to magnetic fields from the welding current or residual magnetism in the base metal, and it happens almost exclusively on DC. Try moving the ground clamp, shortening the arc length, angling the electrode against the blow, or switching to AC if your process allows it.
Can a burn-through be fixed without starting the whole weld over?
Usually, yes. Grind the hole back to clean metal, reduce amperage, and rebuild the joint in smaller, controlled passes — sometimes with a backing strip if the root gap is a factor. Starting over is only necessary if the surrounding heat-affected zone is also compromised.
How do I know if a defect needs to be ground out and re-welded, or if it's just cosmetic?
It depends on the weld's purpose. Non-structural, cosmetic welds can often tolerate minor surface imperfections. Structural, pressure-boundary, or otherwise safety-critical welds should follow the applicable code's acceptance criteria — cracking of any kind and lack of fusion generally require complete removal and re-welding, not surface grinding.
Does AC or DC reduce arc blow more effectively?
AC generally reduces arc blow because the current reverses direction every half-cycle, which tends to cancel out the magnetic deflection that builds up under steady DC current. That's why arc blow is described as primarily a DC problem.
How can I reduce warping when stick welding thin sheet metal?
Lower the amperage, increase travel speed, and break the weld into shorter segments rather than one continuous pass, letting the metal cool between sections. Balancing welds on opposite sides of a joint and using fixturing to hold dimensions also helps control distortion on thin material.
References
- Incomplete Fusion and Incomplete Penetration – Pipe Welding - Lake Washington Institute of Technology, Open Washington Pressbooks, accessed 2026-08-16.
- What is Weld Cracking - American Welding Society, Inspection Trends, 2024.
- Distortion Control - Prevention by Fabrication Techniques - TWI Ltd, accessed 2026-08-16.
- ISO 6520-1:2007 - Classification of geometric imperfections in metallic materials, Part 1: Fusion welding - International Organization for Standardization, 2007.
- Welding Fumes and Manganese - National Institute for Occupational Safety and Health (NIOSH), accessed 2026-08-16.
- Controlling Hazardous Fume and Gases during Welding - Occupational Safety and Health Administration, U.S. Department of Labor.